Tag: Samsung firmware update

  • How to Enter Download Mode and Recovery Mode on Any Samsung Phone

    How to Enter Download Mode and Recovery Mode on Any Samsung Phone

    This guide is for U.S. Samsung owners. It covers two important service areas: Samsung Download Mode and Samsung recovery mode. It doesn’t matter if you have a Galaxy S, Galaxy Note, Galaxy A, or an older model. We’ll show you how to get into download mode (also known as Odin mode Samsung) and how to use the Android recovery environment for upkeep and fixes.

    Download Mode, or Odin mode Samsung, is where Samsung accepts firmware and low-level software. You use tools like Odin here. Recovery Mode is the Android recovery console built into your phone. It’s for factory resets, cache wipes, and other system tasks.

    If you’re okay with using hardware key combinations and basic PC tools, this guide is for you. But remember, entering these modes and flashing firmware can risk your data and warranty if done wrong. Always back up your phone first and follow the steps carefully. See Section 9 for backup options.

    Key Takeaways

    • Samsung Download Mode (Odin mode) allows firmware flashing and device recovery.
    • Samsung recovery mode handles factory resets and cache maintenance.
    • We cover step-by-step methods for most Galaxy models and key combinations.
    • Back up data beforehand to avoid loss and check warranty implications.
    • We include troubleshooting, how to exit Download Mode, and Odin usage.

    What Is Download Mode on Samsung Devices?

    Download Mode is a special mode on Samsung phones. It lets us install official firmware and custom recovery images. It’s like a doorway between the phone and a PC for repairs and updates.

    We use Download Mode when normal booting doesn’t work. It gives us control over system files. This mode is key for using tools like Odin mode Samsung and other flashers.

    Purpose of Download Mode

    The main goal of download mode is to flash firmware and restore system partitions. It’s great for fixing devices with corrupted files or after failed updates. We can install factory firmware, go back to stock ROM, or apply carrier builds.

    At a technical level, download mode lets PC software upload images for AP, BL, CP, and CSC partitions. This access is crucial for fixing severe software errors or for controlled firmware changes.

    Benefits of Using Download Mode

    Using download mode offers controlled firmware installation. This helps fix specific problems without messing with other parts. We can update or downgrade AP, BL, CP, and CSC files to solve bootloops, network issues, or crashes.

    Another advantage is recovering from major failures. If a phone shows a black screen or keeps booting, this mode can fix it. It’s faster and more thorough than OTA recovery for serious problems.

    Developers and advanced users get more from download mode. It supports manual updates, testing firmware, and safe downgrades. But, using Odin mode Samsung or unofficial firmware can void warranties and trigger Knox security flags. Always be careful and use verified files to avoid bricking your device.

    How to Enter Download Mode on Most Samsung Phones

    We’ll show you how to get into download mode. This lets you flash firmware or use recovery tools. Make sure your phone is charged over 50% to avoid losing power.

    The steps work for many Galaxy models. But, they might change based on the year and model.

    Follow this basic sequence to enter Download Mode. If your model needs different steps, check the common key combinations below.

    Step-by-Step Instructions

    1. Turn off your phone completely. Use the power button to choose Power Off, or force shutdown if it’s unresponsive.

    2. You can connect a USB cable to your PC but not to the phone. This helps on some devices when you plug the cable in later.

    3. Press the required hardware key combination while plugging the USB cable into the phone, or press the combination while powering the device on.

    4. Wait for the Download Mode screen to appear. Look for a blue or black screen with Odin, a yellow triangle, or a message saying “Downloading… Do not turn off target.”

    5. If you see the Downloading message, your device is in Odin mode Samsung and ready for flashing tools like Odin.

    Common Key Combinations

    Devices can differ. Below we list the most common key combinations download mode uses by layout and generation.

    Model Group Typical Key Combination Notes
    Older Galaxy S / Note (with Home) Power + Home + Volume Down Hold all three while powering on; release when Downloading appears.
    Galaxy S8–S10 (with Bixby) Power + Bixby + Volume Down Press together while connecting USB or while powering up to reach Odin mode Samsung.
    Galaxy S20 and later, many A-series Power + Volume Down, or Volume Down + Volume Up while connecting USB Some models show a recovery/download selection screen; choose Download Mode to boot into download mode.
    USB-trigger method Hold Volume Up or Volume Down while connecting USB Useful when power or button combos fail; timing matters.

    If the key combinations don’t work, try different timing. Make sure the device is fully powered off. Remove and reinsert the battery if allowed. Try both the cable-connected method and the power-on method to increase success.

    How to Enter Recovery Mode on Samsung Smartphones

    We explore the purpose and steps for using the recovery environment on Samsung phones. Recovery mode on Samsung phones is a basic Android system. It’s used for tasks like factory reset, wiping cache partition, and applying OTA updates from ADB or an SD card. It also runs basic diagnostics for quick fixes.

    Recovery Mode Overview

    Recovery mode is used when a device needs repair without a full boot. It’s helpful for a factory reset when locked out, clearing cache for better performance, and sideloading updates via ADB. It’s different from download mode, which is for flashing firmware via a PC.

    Step-by-Step Instructions

    First, power off the device. For many Samsung models, press Volume Up and Power together until the Samsung logo appears. Then, release when the Recovery menu shows. On phones with a Bixby button, hold Volume Up, Power, and Bixby at the same time.

    Newer Galaxy devices without a physical Home or Bixby might use Volume Up plus Side (Power) or a specific Volume Up, Side, then Volume Up sequence. Some models need a USB cable during the process. If one method fails, try the variant for your exact model.

    Once in recovery, use the volume keys to navigate and the power button to select. Options include reboot system now, wipe data/factory reset, wipe cache partition, and apply update from ADB. Remember, wiping data/factory reset will erase all user data. Always back up important files before doing anything destructive.

    Differences Between Download Mode and Recovery Mode

    We explore how Samsung Download Mode and Samsung recovery mode differ. This helps us choose the right path for troubleshooting or reinstalling software on Galaxy devices.

    differences download mode and recovery mode

    We look at their core functions to see which mode is best for each task. Each mode has its own purpose, affecting the risk, outcome, and tools needed.

    Functionality comparison

    Aspect Download Mode (Odin mode Samsung) Recovery Mode (Samsung recovery mode)
    Primary purpose Firmware flashing and low-level writes via USB with Odin or compatible tools. Local system maintenance such as factory reset, cache wipe, and ADB sideload.
    How to access Hardware key sequence often combined with USB connection; device shows downloading status. Hardware key combo boots to a recovery menu on the device without a PC.
    Capabilities Write bootloader, modem, system images; full firmware reinstall possible. Wipe data, clear cache, apply updates from local storage or ADB sideload.
    Risk profile Higher risk: low-level writes can trip Knox and affect warranty; mistakes can brick device. Lower risk: operations are limited to the system partition and user data unless sideloaded packages alter software.
    Typical tools Odin mode Samsung requires Odin or equivalent PC-side flasher. Built-in recovery interface or ADB for sideloading packages from a computer.

    Use cases for each mode

    We explain when to use each mode based on the device’s state and goals. This helps avoid unnecessary risks and speeds up recovery.

    • When to use Download Mode: Use Samsung Download Mode if the device is bricked, stuck in a bootloop, or needs a full firmware reinstallation. It is the right choice for restoring stock firmware after custom ROMs or when downgrading firmware region.
    • When to use Recovery Mode: Use Samsung recovery mode for factory resets to fix software issues, clearing cache after an update, or applying official OTA packages with ADB sideload for smaller updates.

    We suggest trying recovery options first if the phone can boot to recovery and the issue seems software-level. If the device cannot boot or recovery is inaccessible, prepare to use Odin mode Samsung with caution and the correct firmware files.

    Troubleshooting Download Mode Issues

    Working with Download Mode on Samsung phones can sometimes be tricky. Here are steps to help you find and fix common problems. This ensures a smooth flashing or recovery process.

    • Device won’t enter Download Mode — First, make sure the phone is completely turned off. Try different key combinations for your model. If your phone has a removable battery, remove it for a few seconds before trying again. Connect the USB cable while holding the necessary keys if basic startup methods don’t work.

    • PC does not recognize the device — You need to install official Samsung USB drivers or Samsung Smart Switch drivers. Try using different USB ports and cables. Use the original or a high-quality cable and avoid using hubs or dongles.

    • Stuck on “Downloading… Do not turn off target.” — This could mean a flash is pending. If a flashing tool shows activity, let it complete. If nothing happens, a reboot by holding Power + Volume Down might help. But, be careful as interrupting a flash can brick your device.

    • Odin fails to detect device (no COM port) — Check your drivers in Windows Device Manager. Run Odin as an administrator. Close or uninstall Samsung Kies, Smart Switch, or other software that might block ports. Try a different USB port and cable.

    Tips for Entering Download Mode Successfully

    • Always charge your device fully before trying to enter Download Mode or flash. A low battery can interrupt the firmware transfer.

    • Use a reliable USB cable and plug directly into a PC port. Avoid using USB hubs and unpowered adapters.

    • Install official Samsung drivers and keep Odin up to date on Windows. This helps avoid common Samsung Download Mode issues and supports Odin mode Samsung troubleshooting.

    • Practice timing for key presses. Some Samsung models need keys held before connecting USB, while others require the cable connected first. If you face boot into download mode problems, try both methods.

    • Remember your device model and build number, and always back up before flashing. If unsure, check Samsung support pages or XDA Developers threads for model-specific advice.

    How to Exit Download Mode

    Leaving download mode is usually easy. A simple reboot can get things back to normal. If that doesn’t work, we take more steps to keep your data safe.

    Step-by-Step Guide

    Start with a soft exit. For many Samsung phones, hold Volume Down and Power for 7–10 seconds. This should restart your screen. On some phones, Power + Volume Down + Volume Up works too.

    If that doesn’t work and your phone has a removable battery, take it out. Wait a few seconds, then put it back in and turn it on. This can fix simple problems.

    When using Odin to flash firmware, wait for it to finish. Don’t disconnect the cable until it’s done. This way, you won’t need to force Odin mode exit.

    If your device still won’t budge, try reflashing the stock firmware with Odin. Use Samsung’s official drivers and the right ROM for your model. This lowers the risk of damage.

    Understanding Auto Exit Scenarios

    Most firmware flashes will reboot your phone automatically. After Odin finishes, your phone should exit download mode and start Android on its own.

    If a flash fails, your phone might stay in download mode or show an error. Then, follow the troubleshooting steps we mentioned earlier. Try the flash again or use recovery mode if you can.

    Flashes interrupted or power loss can cause problems. Always let a flash complete without interruption. If you interrupt, try again with the right firmware and stable power. A proper reflash can often fix your device.

    Be careful of Knox and bootloader locks. Some Samsung phones won’t boot normally after certain flashes because of security. If you hit this issue, you might need Samsung’s official tools or a service center to fix it.

    Using Odin in Download Mode

    We explain how Odin works with Samsung devices in Download Mode. We also cover what you need to do before flashing firmware. This guide helps you use the tool safely and confidently.

    What Is Odin?

    Odin is a tool for flashing firmware on Samsung phones. It’s used by service centers and advanced users. It works when a phone is in Download Mode.

    Odin can install system, bootloader, modem, and configuration files. It’s not available from Samsung directly. Instead, enthusiasts share it, while Samsung suggests using Smart Switch and Kies.

    Using Odin requires caution. It can change your device’s state, including warranty flags.

    How to Flash Firmware with Odin

    Before you start, prepare well. Download the right firmware from trusted sources. Install Samsung USB drivers on your PC. Back up your data.

    Make sure the firmware matches your model and region. This is crucial.

    • Launch Odin on a Windows PC as administrator.
    • Boot the phone into Download Mode following the device-specific steps in Section 3.
    • Connect the phone with a USB cable. Odin should show a COM port entry and highlight a blue field when the device is detected.
    • Load files into slots: BL, AP, CP, CSC. Use HOME_CSC to retain user data or CSC to perform a factory reset.
    • Ensure “Auto Reboot” and “F. Reset Time” are checked. Do not enable Re-Partition unless you have a correct PIT file and know the risks.
    • Click Start and wait for the PASS message. Do not disconnect until the process completes.

    After flashing, the device will reboot. The first boot may take a few minutes. This is while the system optimizes apps and settings.

    If Odin shows errors, check the log. Make sure the firmware matches your model. Try a different Odin version or check your USB drivers.

    Remember, flashing wrong firmware can brick your phone. It can also trip Knox and void warranties. Always back up your data and be cautious.

    Importance of Backup Before Using Download Mode

    Before we use download or recovery tools on a Samsung device, we stress the need to protect personal data. Flashing firmware, running a factory reset, or performing deep recovery steps can remove contacts, photos, messages, and app data. Some procedures, such as using CSC files in Odin or full wipes in recovery, will explicitly erase user content. Backups act as a safety net when unexpected failures or Knox security triggers limit restore options.

    Samsung Download Mode backup

    Why backing up data matters

    We should expect risks when we modify firmware. An unsuccessful flash can force a clean recovery that deletes everything. Even routine troubleshooting in recovery mode can remove installed apps and settings. By keeping a current Samsung recovery mode backup, we reduce downtime and avoid permanent loss.

    Knox and security flags matter for businesses and advanced users. Certain operations trip Knox counters and restrict what can be restored or replaced. A verified backup gives us options if a device becomes locked or limited after an operation.

    Recommended backup solutions for Samsung phones

    We recommend multiple layers of protection. Use Samsung Cloud for supported syncs and Smart Switch for full local backups to PC or Mac. Smart Switch creates a comprehensive archive that is ideal before flashing.

    Google Backup and Google Photos handle contacts, calendars, and media. We advise enabling account sync to preserve basic data and turning on Google Photos for photo backups prior to any major change.

    For manual control, copy important files to a computer over USB or move them to a microSD card if the phone supports it. This simple step can save irreplaceable photos and documents.

    Experienced users may use third-party apps like Titanium Backup for app-level exports. We caution that such tools often require root access and elevated permissions, so they suit only advanced users who understand the security trade-offs.

    Always verify backups. Check Smart Switch logs, confirm Samsung Download Mode backup files are complete, and attempt a test restore of a noncritical item. This ensures we can recover when we need to perform a backup before flashing Samsung or rely on an Odin mode Samsung backup.

    Backup Method What It Saves Best Use
    Smart Switch (PC/Mac) Full device image: apps, settings, messages, media Complete local backup before flashing or using Odin
    Samsung Cloud Contacts, calendar, select app data, settings Quick cloud sync for supported items and incremental saves
    Google Backup & Google Photos Contacts, calendar, app data (where supported), photos/videos Cross-device sync and media protection
    Manual PC/microSD copy Photos, documents, downloads, selected folders Fast, reliable copy of critical files before any risky step
    Titanium Backup (advanced) App data and system settings (root required) Deep app-level backups for power users who understand risks

    Frequently Asked Questions About Download Mode

    We answer common questions about Samsung download and recovery features. This FAQ covers safety, model compatibility, and where to find reliable guidance. It helps you before you try anything on your device.

    Is Download Mode safe?

    Entering Download Mode is safe and doesn’t harm your data. It prepares your phone for authorized updates without changing your files. But, using the wrong files or tools can be risky.

    Always use official firmware and tested tools. Wrong flashing can brick your device, void your warranty, or break Samsung Knox security. Always back up your files and consider professional help for complex tasks.

    Can I use Download Mode on any Samsung model?

    Most Samsung Galaxy phones and tablets have Download Mode, also known as Odin mode. But, how you enter it changes with each model and generation. For example, older Galaxy S series models are different from newer foldables like the Galaxy Z.

    Some devices, like carrier-locked or heavily modified ones, might not allow Download Mode. Enterprise-managed devices also have extra security. Always check your model number in Settings > About phone. Then, look up specific instructions from Samsung support, XDA Developers, or SamMobile before you start.

    If you’re unsure, reach out to Samsung Support or visit an authorized service center. They can guide you. When flashing firmware, be careful, choose the right firmware, and use verified tools to avoid damage.

    Our Samsung Download Mode FAQ and Samsung recovery mode FAQ sections help you decide when to use each mode. They also explain the safety steps to follow during each process.

    Conclusion: Navigating Samsung Download and Recovery Modes

    We’ve looked at the main differences between low-level flashing and local maintenance. The Samsung Download Mode summary explains that Odin mode Samsung is for full firmware restores and unbricking via a PC. On the other hand, Samsung recovery mode conclusion shows how to do local tasks like factory resets and cache wipes without a PC.

    Following key steps is important and easy to do. You need to use the hardware key combos in Section 3 to get into each mode. Then, follow the step-by-step recovery instructions in Section 4. If you’re flashing with Odin, check Section 8 first.

    Our review suggests installing official drivers and matching firmware. Also, test your backups before flashing to avoid Knox issues and permanent damage.

    It’s wise to start with non-destructive recovery options. Make sure to check Smart Switch or cloud backups before using Odin. For specific guides, use Samsung support, SamMobile, and XDA Developers. If you’re unsure, it’s best to get professional help instead of trying advanced procedures yourself.

    With the right preparation—correct drivers, verified backups, and careful steps—we can confidently use download and recovery modes for Samsung phones. The Odin mode Samsung recap and Samsung recovery mode conclusion give us a solid toolkit for keeping our devices in good shape.

    FAQ

    Is Download Mode (Odin mode Samsung) safe to use?

    Entering Download Mode is safe and doesn’t harm your device. But, flashing the wrong firmware or using the wrong tools can be risky. This can brick your device, trip Knox, or void your warranty.

    Always back up your data. Use the correct firmware for your model. Install official Samsung USB drivers. And be careful when using Download Mode.

    Can we use Download Mode on any Samsung model?

    Most Samsung Galaxy phones and tablets have Download Mode. But, how you enter it can vary. Some devices, especially those locked to a carrier or managed by a company, might not allow it.

    Check your model number in Settings > About phone. Then, look up specific guidance from Samsung, SamMobile, or XDA Developers before trying.

    How do we enter Download Mode on most Samsung phones?

    First, turn off your phone. Then, use a specific key combo while connecting USB or powering on. Older devices with a Home button use Power + Home + Volume Down.

    Models with Bixby use Power + Bixby + Volume Down. Newer phones often use Power + Volume Down. Hold Volume Up and Volume Down while plugging in USB for some.

    Wait for a screen that says “Downloading… Do not turn off target.” Make sure your battery is charged over 50%. If it fails, try again with different timing.

    How do we enter Recovery Mode on Samsung devices?

    Power off your device. Then, press and hold the right keys until you see the Recovery menu. For recent models, use Volume Up + Power (add Bixby if it has one).

    Release the keys when you see the Android Recovery menu. Use the volume keys to navigate and the power button to select. Recovery Mode lets you wipe cache, factory reset, or apply updates via ADB.

    What’s the difference between Download Mode and Recovery Mode?

    Download Mode is for low-level firmware flashing with Odin or compatible tools. It’s used to install bootloader, system, modem, and CSC files over USB. Recovery Mode is for factory resets, cache wipes, and ADB sideloads.

    Download Mode can write critical partitions and may trip Knox. Recovery Mode is safer for non-destructive fixes.

    What should we do if the phone won’t enter Download Mode?

    First, make sure your device is fully powered off and charged. Try different key combinations or timing. On removable-battery models, remove and reinsert the battery.

    If your PC doesn’t detect the device, install Samsung USB drivers or Smart Switch. Try different USB cables and ports. Avoid USB hubs.

    How do we exit Download Mode if the device is stuck?

    For most models, press and hold Volume Down + Power until it reboots. The combination might differ on some phones. For removable-battery models, remove and reinsert the battery.

    If it’s stuck after a failed flash, reflash the correct stock firmware using Odin. Or seek authorized service.

    What is Odin and when should we use it?

    Odin is Samsung’s Windows-based flashing utility. It installs official firmware components (BL, AP, CP, CSC) via Download Mode. We use Odin to unbrick devices, restore stock firmware, or apply region-specific builds.

    Use Odin with the exact firmware for your device model. Make sure you have the proper drivers installed and a reliable USB connection.

    Why must we back up data before using Download Mode or Recovery Mode?

    Flashing firmware, performing factory resets, or recovery operations often erase user data. Some Odin options (CSC) explicitly trigger full wipes. Even failed flashes can require data-wiping repairs.

    We recommend using Smart Switch, Samsung Cloud, Google Backup, or manual PC backups. This helps preserve contacts, photos, and app data before attempting these procedures.

    What are common Odin errors and how can we fix them?

    Common issues include Odin not detecting the device (no COM port), drivers missing or conflicting software like Kies running, and firmware mismatches triggering FAIL. Fixes include installing official Samsung USB drivers, running Odin as administrator, using a different USB cable/port, disabling Kies/Smart Switch during flashing, and verifying firmware matches the model and region.

    Can using Download Mode trigger Knox or void warranty?

    Flashing unofficial firmware or unlocking certain partitions can trip Samsung Knox and may void warranty protections. Official firmware flashed via authorized tools is less likely to cause issues. But, advanced operations that alter the bootloader or use non-official images carry risk.

    We advise checking warranty terms and using official firmware and support when possible.

    How do we choose the correct firmware for Odin?

    Identify the exact model number (Settings > About phone or the device packaging) and the current build/region. Download firmware from reputable sources like SamMobile, Samsung-Updates, or carrier repositories that match model and region. Using mismatched firmware can brick the device, so verify compatibility before flashing.

    If our device is bricked, which mode should we try first?

    If the device won’t boot or is in a bootloop and Recovery Mode is inaccessible, use Download Mode with Odin to restore stock firmware. If the device can boot to Recovery and the issue appears software-level, try non-destructive Recovery options first (wipe cache, reboot). Always back up data when possible before attempting recovery or flashing.

  • Fix Samsung Bootloop: Causes and Proven Ways to Fix It

    Fix Samsung Bootloop: Causes and Proven Ways to Fix It

    This guide is for Samsung owners and techs in the U.S. to fix a phone that won’t start. We aim to provide clear steps to tackle Samsung bootloop issues. This includes phones stuck on the Samsung logo or showing signs of a soft brick.

    We cover everything from what causes bootloops to how to fix them. You’ll learn about basic fixes like soft resets, safe mode, and wiping the cache partition. We also dive into advanced methods like Odin, Smart Switch, and ADB commands. Each step emphasizes safety, backing up data, and knowing when to seek help.

    Key Takeaways

    • We explain what causes a Samsung bootloop and how to recognize it quickly.
    • We outline simple fixes first: soft reset, safe mode, and cache wipe.
    • We show advanced recovery paths including Smart Switch, Odin, and ADB.
    • We highlight data backup and safety steps before attempting repairs.
    • We advise when to seek professional help to avoid worse damage or data loss.

    What is a Samsung Bootloop?

    A bootloop happens when a Samsung device can’t start up. It keeps restarting or gets stuck on the Samsung logo. Searches like what is Samsung bootloop, phone stuck on Samsung logo, and soft brick Samsung all relate to this issue.

    Definition of Bootloop

    A bootloop occurs when the bootloader, kernel, or Android runtime can’t start. It’s usually caused by software problems. This includes damaged app data, bad updates, or mods that don’t work.

    Deeper issues like firmware damage or a corrupt boot image are harder to fix. They often need professional tools.

    How Bootloop Affects Your Device

    The boot process has several stages. The bootloader starts, then the kernel, followed by the Android runtime. Finally, system services begin. If any stage fails, the device restarts or gets stuck on the logo.

    When a device boots into a loop, users can’t access their apps, contacts, or messages. The constant restarting can damage files and drain the battery. Trying to fix it without a backup can lead to losing all your data. So, we advise caution before taking any major steps.

    Common Causes of Samsung Bootloop

    Bootloop problems come from different sources. Knowing the cause helps us find the right solution. We’ll look at the main reasons for a phone stuck on Samsung logo or soft brick Samsung.

    Software glitches can start small but grow. Issues like app conflicts, corrupted caches, and rogue processes can stop the phone from starting up. A bad system app or cache error can make the phone restart over and over or get stuck on Samsung logo.

    Software Glitches

    We first check for app conflicts and cache corruption. Apps with too much power can mess with core files and cause kernel panics. Processes that shouldn’t be there can block boot services. Sometimes, cleaning caches or removing bad apps fixes the problem.

    Faulty Updates

    Broken OTA updates or wrong firmware can cause bootloop right after install. If an update doesn’t finish or the wrong ROM is flashed, the device might become soft brick Samsung. This often happens when users press “Install” and the phone keeps restarting.

    Corrupted update packages can leave system files incomplete. If the bootloader can’t find the right system files, the phone won’t move past the logo. Usually, reapplying the right firmware or flashing properly fixes it.

    Hardware Issues

    Physical problems can look like software issues. Bad eMMC or damaged storage can stop the OS from loading. A broken motherboard, faulty power IC, or loose connectors after a drop or spill can also cause frequent restarts and a phone stuck on Samsung logo.

    We look for signs of hardware problems: a bootloop after a fall, corrosion from moisture, or power issues. These signs tell us to look at hardware repairs or replacements instead of software fixes.

    To figure out the cause: a bootloop right after tapping install is often from firmware or a bad update Samsung. A loop after installing a new app or giving root access is from software glitches. A loop after physical damage means hardware failure.

    Signs Your Samsung is in a Bootloop

    When a Samsung device won’t start up right, we look for clear signs. These signs help us tell if it’s just an app crash or a bigger problem. It’s important to notice patterns and write down what happens before trying to fix it.

    Inability to Startup

    If the phone shows the Samsung logo but doesn’t get past it, we have a serious problem. It might try to load Android but get stuck on the logo for a long time. If the screen stays on the logo, it means there’s a problem with the system files or partitions.

    Continuous Restarting

    The phone keeps turning on, showing the logo, and then restarting. This cycle can happen fast or take a few minutes. If Samsung keeps restarting without you doing anything, it means the system can’t finish booting and keeps trying.

    Error Messages Displayed

    Error messages pop up in Recovery or Download Mode. You might see “Unfortunately, System UI has stopped” or “recovery is not seandroid enforcing.” These messages tell us about missing or damaged partitions. We pay attention to these messages because they help us know what to do next.

    It’s a good idea to do quick checks to see if it’s a bootloop. Try Safe Mode or Recovery to see if it can load basic services. Also, watch for LED lights or vibrations during the cycle. These can hint at hardware issues rather than software problems.

    How to Prepare for Bootloop Fixes

    Before we start, we take a few steps to make things safer and faster. We make a plan to handle Samsung devices that won’t start right. Our goal is to keep your data safe, make sure the phone has power, and have the right tools ready.

    prepare to fix Samsung bootloop

    Backup Your Data

    Backing up your data is our top priority before doing a factory reset. We use Google Account sync, Samsung Cloud, or Smart Switch if the phone is working. If it’s stuck in recovery mode, we try ADB pull or other recovery-mode options to save your files.

    If you can’t back up normally because of a bootloop, take out the microSD card if it has one. We also write down your IMEI and account details so we can handle Factory Reset Protection later.

    Fully Charge Your Phone

    It’s best to charge your phone to 60–80% before we start. For big tasks like Odin flashes or factory resets, keeping it plugged in helps avoid interruptions that could damage the phone.

    Gather Necessary Tools

    We get all the tools we need for Odin fixes and troubleshooting ready before we start. You’ll need a good USB cable, a Windows PC, Samsung Smart Switch, Odin software, Samsung USB drivers, and ADB/Fastboot tools. Having a stable internet connection is also important for downloads and account checks.

    For any hardware work, we add a SIM ejector, a small Phillips screwdriver, and basic ESD precautions. We also keep your Google and Samsung account logins handy and check your warranty status. This helps us decide the best repair option and how to handle data loss risks.

    Preparation Step Why It Matters Suggested Tools
    Data backup Prevents permanent loss when a reset or flash is required Google Account, Samsung Cloud, Smart Switch, ADB pull, microSD removal
    Charge device Stops mid-process shutdowns that can corrupt firmware Wall charger, cable, power bank for longer sessions
    Collect tools Speeds up recovery and avoids delays during critical steps USB cable, Windows PC, Odin, Samsung USB drivers, ADB/Fastboot, internet
    Document credentials Helps bypass FRP and reclaim the device after resets Record IMEI, Google and Samsung account logins
    Hardware readiness Allows safe inspection and minor repairs without static damage SIM ejector, Phillips screwdriver, anti-static wrist strap

    Basic Solutions to Fix Samsung Bootloop

    When your phone gets stuck on the Samsung logo, start with simple steps. We’ll show you quick fixes that might solve the problem without losing your data. Try each step one by one and see if your phone boots up normally before moving on.

    Soft reset

    Press the Power and Volume Down buttons together for 10–20 seconds to force a reboot. This soft reset Samsung method can fix many issues caused by a software glitch. Use it first if your screen is unresponsive or your phone keeps restarting.

    Remove the battery

    If your phone has a removable battery, turn it off, remove the battery, wait 30 seconds, then put it back in and start again. This step drains power and can fix problems a reset can’t. For phones without removable batteries, press Power + Volume Down to simulate battery removal. Be careful not to force parts on sealed devices.

    Boot into safe mode

    To enter safe mode, press and hold the Power button until the power menu shows. Long-press Power Off until you see Safe Mode, then tap to restart. On older models, use the volume-down combo during boot to enter safe mode. This option disables third-party apps to see if one is causing the bootloop.

    Start with a soft reset, then try booting into safe mode. Uninstall any recent or suspicious apps and test again. If your phone still gets stuck on the Samsung logo, we’ll move on to more advanced recovery methods.

    Advanced Solutions for Samsung Bootloop

    When simple steps don’t work, we try more advanced methods. These methods aim to fix system problems without guessing. We’ll explain each option, what it does, and any important warnings.

    Wipe Cache Partition

    To get into Recovery Mode, press the right buttons for your phone. For newer Galaxy phones, it’s Volume Up + Power + Bixby or Volume Up + Power. In Recovery, choose “Wipe cache partition.” This clears temporary files without losing your personal data.

    Clearing the cache often solves problems after updates or when caches get messed up. It takes a few minutes. If it works, your phone should start up normally after a reboot. If not, try the next step.

    Factory Reset Your Device

    If wiping the cache doesn’t help, a full reset from Recovery Mode is next. Pick “Wipe data/factory reset” to reset to factory settings and clear all user data.

    Be careful, as a factory reset erases apps, photos, and settings. After resetting, you might need your original Google or Samsung account to set up the phone. Always back up your data first and try simpler fixes.

    The reset takes 10–20 minutes. If your phone still won’t boot, it might be a hardware issue or a damaged system image.

    Use Samsung’s Smart Switch

    Samsung Smart Switch on your computer offers a fix called Emergency Software Repair. Connect your phone to the PC with a USB cable, open Smart Switch, and follow the Emergency Software Repair or Device Initialization steps.

    This tool reinstalls official firmware without using Odin. It can fix a soft brick Samsung caused by system file corruption. You need a stable internet connection and a device with an unmodified, locked bootloader. Custom ROMs or unlocked bootloaders might block Smart Switch repair.

    Reinstalling takes 20–40 minutes. If Smart Switch says it’s not compatible, don’t force other firmware tools. Instead, consider getting professional help.

    Method What It Does Timeframe Best For Key Caution
    Wipe cache partition Removes temporary system files, keeps user data 5–10 minutes Post-update glitches and corrupted caches May not help if system files are damaged
    Factory reset (Wipe data) Restores factory settings, erases all user data 10–20 minutes Severe software corruption after backups are made FRP requires original Google/Samsung account
    Samsung Smart Switch fix Reinstalls official firmware via desktop app 20–40 minutes Soft brick Samsung and failed OTA updates Not compatible with custom ROMs or unlocked bootloaders

    Using ADB Commands for Bootloop Issues

    ADB can help when a Samsung phone gets stuck in a bootloop. It’s best when the device can enter recovery mode or has USB debugging on. If the phone won’t respond, we might need to use Odin or Smart Switch to fix it.

    Setting Up ADB on Your Computer

    First, we install Android SDK Platform-Tools on Windows, macOS, or Linux. Then, we install Samsung USB drivers on Windows. macOS and Linux users use terminal permissions instead.

    On Windows, check Device Manager if drivers don’t work. Enable USB debugging on the phone by going to Settings > About phone and tapping Build number. Then, turn on USB debugging in Developer options.

    After connecting the phone with a good USB cable, run adb devices to check if it’s recognized.

    Executing ADB Commands

    To boot to recovery, use adb reboot recovery. To back up files, use adb pull /sdcard/DCIM/ to copy photos and documents to your computer.

    If you have an update package, apply it with adb sideload update.zip from recovery. Fastboot commands might work for some unlocked devices, but many Samsung phones use Odin instead. If the device won’t connect during a bootloop, ADB options are limited until recovery or debugging is possible.

    Tips for ADB Success

    Use original USB cables and USB 2.0 ports to avoid connection issues. Update drivers regularly. Installing Samsung Kies or Smart Switch can add compatible drivers on Windows.

    If recognition fails, try different computers. Keep a log of every command before taking risky actions that could erase data. If ADB can’t reach the device, consider using fix bootloop Odin procedures or Smart Switch for firmware restores.

    Utilizing Recovery Mode

    When your Galaxy device stops working, recovery options can help fix it. These tools let us clear caches, update the system, or reset the phone without starting Android. We’ll show you how to access these tools, safely restore your system, and when to use custom recoveries like TWRP or Odin.

    recovery mode Samsung

    How to access recovery on your phone

    Many Samsung phones use buttons to enter recovery mode. For newer Galaxy devices with Bixby, press Volume Up + Bixby + Power when off. Older phones with a Home key use Volume Up + Home + Power. If buttons don’t work, you can use adb with adb reboot recovery or Smart Switch on a computer.

    Always check Samsung support for the exact steps for your model. Different models and firmware versions require different methods. Using the right method helps avoid accidental bootloader changes.

    How to perform a system restore safely

    Recovery menus offer options like rebooting, wiping the cache, factory reset, and applying updates. To restore your system safely, start by wiping the cache partition. This keeps your data safe while clearing temporary files.

    For deeper fixes, a factory reset will erase your data but often solves software problems. You can apply official updates via ADB sideload or use Smart Switch to reinstall firmware on many Samsung phones.

    For firmware flashes needing a PC, Odin is used for Samsung firmware. Always use official packages and follow specific instructions for your model to avoid bricking your device.

    When to consider custom recovery solutions

    Custom recoveries are for advanced users who run custom ROMs or need full backups. Installing TWRP offers nandroid backups, flexible restores, and alternate install methods. We might choose custom recovery Odin when stock recovery can’t apply necessary images or for more control over partitions.

    But, custom recoveries come with risks. They may void your warranty, trigger FRP, and increase the chance of a permanent brick if not done right. Only experienced users should attempt custom recovery Odin or TWRP installs, and always check compatibility and bootloader status first.

    Action When to Use Pros Cons
    Wipe Cache Partition Slow boot, app crashes Safe, preserves data, quick May not fix deep firmware issues
    Factory Reset Persistent software corruption Resolves many system errors Erases user data; backup needed
    Apply Update from ADB/SD Install official OTA or ZIP Uses signed packages; official Requires technical steps and files
    Smart Switch / Odin Flash Firmware reinstall or downgrade Powerful recovery for firmware issues Risk of model mismatch; PC needed
    Custom Recovery (TWRP / custom recovery Odin) Rooting, custom ROMs, full backups Advanced features: nandroid, mounts Voids warranty, FRP/bootloader risks

    Seeking Professional Help

    If simple fixes don’t work or if your device has physical damage, it’s time to get professional help. A skilled technician can find hardware problems, get back your important data, and prevent making things worse. Make sure to bring your purchase proof and IMEI number to make the visit quicker.

    When to Visit a Service Center

    Go to an authorized center if you’ve tried safe mode, cache wipe, or ADB restores without success. If your phone was dropped, got wet, or won’t charge or cool down, it’s a hardware issue.

    When you can’t back up your files and your device is locked, a data recovery expert is crucial. For serious mainboard problems, a Samsung-certified tech has the right tools and parts.

    Typical Repair Costs

    Repair prices change based on the model and where you are. Basic checks or software updates might cost $50–$150 in the US. Fixing the mainboard can cost $150 to $400 or more for newer phones.

    Adding screen or battery repairs will increase the total cost. Using genuine Samsung parts will also raise the price. Always ask for a written estimate to compare prices before agreeing to the work.

    Warranty Considerations

    The Samsung warranty covers defects but not damage from water, drops, or unauthorized fixes. Rooting or unlocking your phone can void the warranty for software and hardware problems, including a soft brick.

    Check your warranty through the Samsung Members app or your original receipt. Carrier insurance and third-party warranties might cover some repair costs. Contact Samsung Support or an authorized service center for repair timelines and warranty coverage.

    Preventing Future Bootloop Problems

    We can lower the chance of a bootloop by following a few simple habits. Taking care of our devices before and after updates is key. Here are some easy steps for regular maintenance, safe app use, and keeping hardware in good shape.

    It’s best to install official OTA updates right away. Make sure the battery is over 50% and Wi-Fi is strong before updating. These steps help avoid Samsung bootloop issues caused by interrupted or damaged installs.

    Avoiding incompatible apps

    Stick to downloading apps from Google Play or the Samsung Galaxy Store. Always check app permissions and read user feedback. Stay away from unknown APKs and tools that require root access unless you know what you’re doing. Remove any app that crashes or drains your battery too fast to prevent soft brick Samsung problems.

    Importance of device maintenance

    Keep your phone in a protective case and avoid drops and moisture. Clean your ports carefully. Make sure you have enough storage and clear cache regularly to keep your phone running smoothly. Back up your data with Smart Switch or cloud services to avoid losing important files if you need to fix a stuck phone.

    Everyday habits can help a lot. Always have at least 10–20% free storage, limit experimental firmware flashes, and avoid fast chargers that can overheat your battery. These steps help prevent soft brick Samsung issues and keep your device healthy for a long time.

    Practice How to Do It Benefit
    Install official updates Use OTA, ensure battery >50%, stable Wi‑Fi Reduces corrupted installs that cause bootloops
    Use trusted app stores Download from Google Play or Samsung Galaxy Store Limits incompatible apps and security risks
    Regular backups Smart Switch or cloud backups weekly Minimizes data loss if recovery is required
    Physical protection Case, screen protector, avoid moisture Prevents hardware faults that lead to boot issues
    Storage and cache care Keep 10–20% free space, clear cache periodically Improves stability and reduces startup errors
    Avoid risky modifications No experimental firmware or unknown root tools Prevents soft bricks and supports phone stuck on Samsung logo prevention

    Conclusion: Your Path to Fixing the Bootloop

    We’ve outlined a clear path to fix a phone stuck on Samsung logo or a soft brick Samsung. First, we diagnose the problem. Then, we try simple fixes like a soft reset and safe mode. If these don’t work, we move to more advanced steps like wiping cache, factory reset, and using tools like Odin or ADB.

    Remember, follow the steps in order and back up your data whenever you can. Always choose safe methods to fix Samsung bootloop issues. Using tools like Odin can help, but misuse can make things worse or void your warranty. If you think it’s a hardware problem, go to an authorized service center.

    Act fast to save your data and prevent more damage. Many bootloop problems can be fixed with careful troubleshooting. But, delays can lead to permanent loss. If you’re not sure what to do, contact Samsung support or visit an authorized repair center.

    For specific help, check Samsung’s official support pages, the Samsung Members app, or trusted communities like XDA Developers. Always try safe, official methods first. This way, you avoid making a bad problem worse.

    FAQ

    What is a Samsung bootloop and how does it differ from a soft brick?

    A Samsung bootloop happens when a device can’t start up and keeps restarting. A soft brick is a software problem that can be fixed with tools like a soft reset. But, a hardware problem or bad firmware might need a pro to fix.

    My phone is stuck on the Samsung logo. What quick steps should we try first?

    First, try a soft reset by holding Power + Volume Down for 10–20 seconds. Then, try Safe Mode to disable apps. If it works, remove and put back the battery. These steps might fix the problem before you need more advanced tools.

    How do we back up data if the phone won’t boot normally?

    If your phone can get to Recovery Mode or ADB, use adb pull to save files. Smart Switch’s backup can also help. For devices that almost work, try Recovery Mode and ADB sideload or Smart Switch repair. If all else fails, you might need a pro to get your data back.

    When should we wipe the cache partition, and what does it do?

    Wiping the cache partition removes temporary files without losing your data. Try this early if a bootloop happens after an update or app install. Use the device’s button combo to get to Recovery Mode and choose “Wipe cache partition.” It often fixes problems caused by bad caches after updates.

    Will a factory reset fix a bootloop, and what are the downsides?

    A factory reset can fix firmware problems by going back to default settings. But, it erases all your files and might trigger Factory Reset Protection (FRP). You’ll need your original Google or Samsung account to use the device again. Back up your data first and try simpler fixes before resetting.

    What is Odin, and when should we use it to fix a Samsung bootloop?

    Odin is a tool for Windows to reinstall official firmware. Use Odin when other fixes fail or you need to manually flash stock firmware. It can fix soft-bricked devices but requires caution—use the right firmware, Samsung drivers, and follow steps carefully.

    Can Samsung Smart Switch repair my phone without using Odin?

    Yes, Smart Switch desktop has an “Emergency Software Repair” feature. It can reinstall firmware and fix many boot issues without Odin. It’s safer for most users but might not work on devices with custom ROMs or severe hardware problems.

    How do we use ADB to help with bootloop problems?

    If your device is in Recovery or has USB debugging on, set up ADB on your computer. Use adb devices to confirm the device. Useful commands include adb reboot recovery, adb pull for backups, and adb sideload for updates. ADB needs drivers and a working connection; otherwise, use recovery or Smart Switch.

    What are the signs that the bootloop is caused by hardware rather than software?

    Hardware issues might include a bootloop after a drop or water damage, odd power behavior, or failure to enter Download/Recovery modes. Unusual heat or visible damage also points to hardware problems. Repeated software fixes after official firmware flashing suggest hardware faults like a failing eMMC or damaged motherboard.

    When should we take the phone to a service center, and how much will it cost?

    Take your phone to a service center after trying software fixes or if you suspect damage. Diagnostic or software reflash fees in the U.S. are usually –0. Mainboard repairs or replacements can cost 0–0+ depending on the model and part availability. Check warranty, Samsung support, and authorized centers for estimates.

    Will fixing a bootloop void our warranty?

    Official repairs by Samsung or authorized centers usually keep your warranty valid. But, unlocking the bootloader, installing custom recoveries, or third-party repairs can void it. Always check your warranty status and use authorized support when possible.

    How can we prevent bootloop problems in the future?

    To avoid bootloops, install official OTA updates quickly and keep battery and Wi-Fi stable during updates. Avoid unknown APKs and risky tools, keep enough free storage, and back up regularly. Physical care like cases and screen protectors also helps prevent hardware-related bootloops.

    Our device is rooted or running a custom ROM—does that affect repair options?

    Rooted devices and custom ROMs can make recovery harder. Official tools like Smart Switch might fail, and FRP can trigger after resets. Odin flashes might need extra steps. Custom recoveries (TWRP) offer advanced restores but pose risks. Experienced users should proceed with caution and document current firmware and backups before making changes.

    Are there model-specific steps we should follow to access Recovery or Download Mode?

    Yes, button combinations vary by model. For example, Volume Up + Bixby + Power on some Galaxy devices, or Volume Up + Power + Home on older models. If button combos don’t work, use adb reboot recovery or check Samsung’s model-specific support pages. Always verify the exact sequence for your model before trying advanced steps.

    What safety tips should we follow during advanced fixes like Odin or firmware flashing?

    Make sure your phone has at least 60–80% battery or is plugged in. Use a reliable USB cable and USB 2.0 port, install official Samsung USB drivers, and download matching firmware for your model and CSC. Document account credentials for FRP. Avoid interrupting the flashing process; if unsure, stop and seek professional help to prevent damage.

    If our attempts fail, can data be recovered from a bricked Samsung phone?

    Data recovery is possible, especially if the storage is intact and the device can be accessed in certain modes. Professional data recovery services can extract files from chips or working partitions. Success depends on the damage type and prior attempts. Stop further flashing or repair attempts and consult a reputable data recovery specialist when data is critical.

  • How to Fix Lost Signal (IMEI Null) After Changing Samsung Firmware

    How to Fix Lost Signal (IMEI Null) After Changing Samsung Firmware

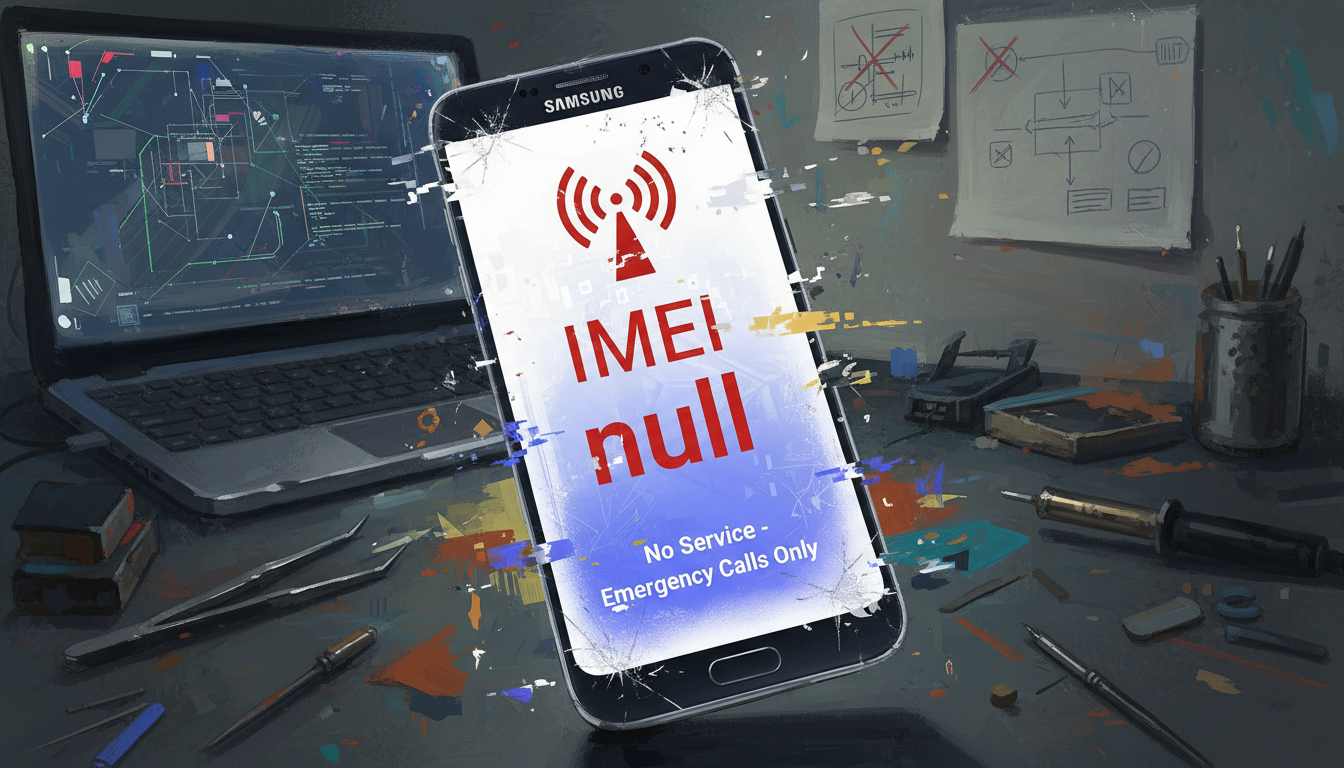
    This guide is for U.S. users who lost mobile network after changing Samsung firmware. You might see “IMEI: null,” “unknown,” or “baseband unknown” messages. These issues often happen after unofficial ROM installs or region mismatches.

    We’ll take a step-by-step approach to solve these problems. We’ll cover the causes, basic troubleshooting, and how to restore IMEI on Samsung devices. We’ll also talk about using official Samsung tools and when to get professional help.

    This guide is for tech-savvy users who flashed firmware or want to fix their device. Before starting, make sure to back up your data. Remember, changing IMEI is illegal in many places. Our goal is to help you restore your device’s original settings legally.

    Key Takeaways

    • Samsung IMEI null often follows firmware flashes or CSC mismatches.
    • Symptoms include “IMEI: null,” “baseband unknown,” and “network not registered.”
    • We cover troubleshooting, re-registering IMEI, and official tools like Smart Switch and Odin.
    • Always back up your data and follow legal restoration methods.
    • Intended for users comfortable following technical instructions.

    Understanding IMEI Null Issues and Their Causes

    First, let’s define the problem. IMEI stands for International Mobile Equipment Identity. It’s a unique number used by carriers to verify a phone. If a phone shows IMEI null, IMEI: 0, or an unknown IMEI state, it means the device’s EFS partition or NVRAM is damaged. This area holds radio settings and identity data.

    This is different from being blacklisted by a carrier. IMEI null is a local issue that stops the phone from showing a valid ID to the network.

    Now, let’s look at common reasons for this problem after flashing. Flashing the wrong firmware can mess up EFS mappings. If the Odin flash is interrupted or the wrong PIT file is used, NVRAM might not be complete.

    Also, if the EFS/NVRAM backup is corrupted or missing, IMEI records can be lost. Custom ROMs that don’t handle modem or EFS properly can also delete important data. Errors during flashing or hardware problems like failing storage can cause similar issues.

    Let’s talk about how this affects daily use. A phone with IMEI null can’t connect to mobile networks. This means calls and mobile data won’t work. SMS might not send, and the phone might say “network not registered.”

    The About phone screen might show “baseband unknown cause.” This means the radio firmware is not recognized or is not compatible. Services like Wi-Fi calling and VoLTE might stop working. But, the phone can still use Wi-Fi.

    Carriers block service because the phone can’t show a valid IMEI.

    We have a quick guide to help you figure out what’s wrong with your device.

    Issue Typical Cause Observable Symptom
    Corrupt EFS/NVRAM Failed or incomplete firmware flash; bad backup restore IMEI null, IMEI: 0, inability to register to network
    Incompatible firmware Region-mismatched ROM or missing modem files Baseband shows unknown, mobile data and calls fail
    Interrupted flashing Power loss or USB interruption during Odin/flash Partial write, unstable radio, network not registered
    Custom ROM without modem support ROM excludes proper modem binaries or EFS handling IMEI lost, VoLTE/Wi-Fi calling disabled
    Hardware storage failure Failing eMMC or UFS chip Repeated corruption, persistent IMEI null across flashes

    Signs You Have an IMEI Null Error

    After updating our Samsung device, we might notice signs of damage. This includes issues with the radio layer or EFS/NVRAM. Knowing these signs helps us act fast to fix IMEI problems.

    No Signal or Poor Connectivity

    After updating, we might see no bars or an “Emergency calls only” message. This could mean our phone’s radio or baseband firmware is damaged. It might also cause data, SMS, and calls to fail at random.

    Seeing “network not registered” is another warning sign. It means our modem isn’t talking to the carrier. Even with a good SIM and coverage, a no signal issue could point to firmware damage.

    Device Identification Problems

    In Settings > About phone, we check the IMEI. If it’s null, unknown, or empty, it’s a big problem. Dialing *#06# should also show our IMEI. If it doesn’t, it’s a clear sign of trouble.

    Looking at the Baseband version is also important. If it’s unknown or missing, it’s a sign of EFS/NVRAM corruption. These signs often mean we need to fix our Samsung IMEI.

    Unexpected Restarts or Crashes

    Corrupted radio firmware or a mismatched modem can cause problems. Our devices might restart often, freeze, or crash apps. This is because the system is unstable.

    These issues don’t always mean an IMEI problem. But they often happen when trying to fix baseband issues. We treat these symptoms as part of a bigger troubleshooting plan.

    Symptom What to Check Likely Cause
    No bars / Emergency calls only SIM seating, carrier coverage, dialer status Corrupted baseband firmware leading to network not registered
    IMEI shows null or unknown Settings > About phone, dial *#06# EFS/NVRAM corruption causing Samsung IMEI null
    Baseband listed as unknown Check Baseband version in About phone Missing or damaged modem firmware; need to fix baseband unknown
    Frequent reboots or app crashes Observe logs, safe mode, recent flashes Mismatched modem or corrupted radio causing instability and no signal Samsung

    Basic Troubleshooting Steps to Start With

    We start with simple checks to solve many connection issues. These steps help find and fix basic problems before trying more complex repairs. Make sure to test your phone after each step.

    Restart Your Device

    Try a full power-off restart instead of a soft reset. Press the power button, choose Power Off, wait 30 seconds, then turn it back on. This can reset the modem and sometimes fix the signal.

    Boot into Safe Mode to see if apps are causing problems. Safe Mode turns off third-party apps. This helps find if an app is causing issues.

    Check SIM Card Functionality

    Take out and put back the SIM card to check for dirt or misalignment. This can cause “network not registered” errors.

    Test the SIM in another phone to see if it works. Also, try a known-working SIM in your Samsung device. This helps figure out if the problem is the SIM or the phone.

    Look at the SIM tray contacts and check eSIM settings in the Samsung settings app. These steps help before moving to software fixes.

    Verify Network Settings

    Make sure Airplane Mode is off and check the network type (LTE/3G/2G). The wrong setting can block carrier registration.

    Review APN settings and carrier profile updates. Wrong APN or outdated carrier files can cause connection problems.

    Try changing Network operators from automatic to manual and back to automatic. If you still see errors, the problem might be deeper. Then, follow steps to fix baseband unknown or seek expert help for IMEI repair.

    How to Re-Register Your IMEI

    When a Samsung device shows Samsung IMEI null after a firmware change, we need a clear, step-by-step approach. The process starts with basic checks, moves through what we can do with the phone dialer, and finishes with verification steps. These steps help confirm a successful restore IMEI Samsung attempt.

    Samsung IMEI null

    Accessing the Dialer

    Some Samsung models let us open diagnostic and service menus from the phone app. Entering *#06# displays the current IMEI and helps confirm whether the device reports Samsung IMEI null. Service-mode dialer codes vary by model and region, so we should document visible values before making changes.

    We should keep a copy of the original IMEI found on the retail box, under the battery, or in our carrier account. That copy serves as the reference if we need to restore IMEI Samsung from backup or confirm a repair.

    Entering the Correct Codes

    Standard consumer dialer codes rarely allow a full IMEI rewrite. In some cases, authorized service-level menus or Samsung service tools can rewrite IMEI from a valid EFS backup. We must respect legal limits: rewriting IMEI to conceal a device is illegal in many jurisdictions. We only discuss restoring a legitimate original IMEI lost to software corruption.

    If we have an EFS backup, specialized restoration tools or service center software can re-register IMEI Samsung. Without that backup, re-registration typically requires professional tools and authenticated service access rather than basic dialer codes IMEI entries.

    Verifying IMEI After Re-Registration

    After any restore IMEI Samsung attempt, we should verify results in Settings > About phone and by dialing *#06# again. Confirming the IMEI and checking that the baseband version is populated helps ensure network functions return.

    If IMEI still reads null, we recommend pursuing an EFS restore or contacting a Samsung authorized service center for professional repair. Keep a copy of the original IMEI handy to confirm that re-register IMEI Samsung efforts restored the correct value.

    Using Samsung’s Official Tools for IMEI Restoration

    We explain how to fix a lost IMEI after changing firmware. These tools solve software problems that might make your IMEI null or cause baseband errors. Make sure to follow each step carefully and use the right files for your model to avoid damage.

    Samsung Smart Switch IMEI

    Samsung Smart Switch is for backing up and fixing software issues on supported devices. It can reinstall official firmware or run recovery processes. These can fix system partitions and might bring back normal baseband behavior.

    To use Smart Switch, you need a compatible PC, a USB cable, and the latest version. Connect your device, select emergency software recovery or reinstall, and follow the prompts. This method might fix your IMEI without needing advanced flashing.

    Odin fix baseband unknown

    Odin is Samsung’s tool for flashing official AP, BL, CP, and CSC files. It’s used by service centers and advanced users. Flashing the right CP (modem) and EFS-backed files can fix baseband unknown and IMEI null issues when software partitions are damaged.

    • Get model-specific firmware from trusted sources like SamMobile or Samsung’s official servers.
    • Back up EFS and user data if you can before starting.
    • Enter Download Mode, load the right PIT/CP/AP files in Odin, then flash carefully.
    • Check the baseband and IMEI after rebooting.

    Be careful with Odin as it can brick your device. Only flash files that match your exact SM-XXXX model and region. If your bootloader is unlocked or the device was rooted, warranty and behavior may change.

    Tips for Using Official Tools Safely

    Always use official, model-specific firmware and check the device model and region. Back up everything with Smart Switch or ADB before flashing. Make sure the battery is over 50% and use the original USB cable for a stable connection.

    Follow detailed guides from trusted repair communities or Samsung support. Keep your device’s serial and IMEI records handy. Flashing official firmware usually keeps your warranty, but unlocking or rooting before can affect it.

    Seeking Professional Help for Complex Issues

    When simple fixes don’t work, it’s time to call in the experts. Trained technicians can find and fix deep problems that home tools can’t handle. Issues like a Samsung IMEI null condition often require professional help.

    Start by contacting Samsung support to check if your device is still under warranty. They can guide you on what to do next. If the problem is from an official update or a manufacturing defect, repairs might be free. But, if a third-party firmware caused the issue, you might have to pay for a diagnosis first.

    When to Visit a Service Center

    Take your device to a service center if simple fixes can’t fix the IMEI issue. This is also true if the modem or radio fails tests or if you need to verify serials and IMEI. Authorized technicians can safely fix these problems and work with carriers if needed.

    What to Expect from Professional Repair

    Service centers do detailed checks and may reflash official software. They can also restore the EFS partition from backups. Technicians test the radio and modem and might use special tools to fix the IMEI.

    Cost Implications of Professional Services

    If your device is still under warranty and Samsung accepts the fault, repairs are free. If it’s out of warranty, you might have to pay a diagnostic fee first. Simple fixes are usually cheap, but more serious repairs can cost a lot.

    Issue Type Typical Service Action Expected Cost Range
    Software corruption (EFS/IMEI missing) Official reflash, EFS restore from backup, carrier coordination Free under warranty; $25–$150 out of warranty
    Locked bootloader or warranty locks Manufacturer-level unlocking, verification, official tools Free if covered; $50–$200 otherwise
    Hardware fault (UFS/eMMC or radio module) Board-level repair or component replacement, radio testing $150–$600 depending on parts and labor
    Third-party firmware damage Diagnostic, official reinstallation, possible hardware checks $50–$300 based on complexity

    For urgent issues, like SIM and registration errors, professional help is often the fastest solution. If your device keeps showing no-network states after trying fixes, a service center visit can help. Visiting a Samsung service center is the safest way to get a permanent fix.

    Preventative Measures to Avoid IMEI Null in Future

    We aim to keep our Samsung devices safe from signal loss and data damage. Simple habits before and during updates can help prevent IMEI null. These steps focus on safe software, firmware, and backup practices.

    Regular software updates

    We update our Samsung devices with official OTA updates as soon as they’re available. We test updates for modem and system compatibility. This keeps our devices secure and reduces the risk of modem problems.

    Proper firmware management

    We avoid unofficial firmware and ROMs unless we’re experienced with flashing. When flashing, we ensure the firmware matches our device’s model and carrier. We also consider the bootloader state to avoid partition damage and baseband errors.

    Backing up device information

    We always backup EFS/NVRAM before firmware changes. Smart Switch safely backs up user data for most users. Advanced users use specialized tools for a root-level backup. We keep the original IMEI record safe to re-register if needed.

    Here’s a quick guide for firmware changes.

    Action Who Should Do It Benefit
    Install official OTA updates All users Keeps modem compatibility, reduces risk to baseband
    Use manufacturer firmware matching model/CSC Experienced users and technicians Minimizes chance to prevent Samsung IMEI null and avoid baseband unknown
    Backup EFS Samsung and NVRAM All users before flashing Allows restoration of IMEI and network data if partitions are damaged
    Keep IMEI records off-device All users Makes re-registration with carrier straightforward if needed

    By following these steps, we lower the risk of IMEI loss. Cautious firmware handling and reliable backups help avoid baseband issues. This makes recovery faster if problems arise.

    Additional Resources and Support Options

    We’ve put together a list of places to get help when your Samsung device has IMEI errors or shows a network not registered status. These resources help us check our steps, compare firmware, and find fixes that work. We avoid services that can change your IMEI.

    Samsung IMEI null help

    Online Forums and Community Support

    We look to active communities for help with our Samsung devices. Sites like XDA Developers have detailed threads for many Samsung models. They offer logs and advice on flashing.

    Reddit communities like r/GalaxyS and r/Samsung also have user reports and recovery tips. These can guide us to reliable fixes.

    When using forums, we check the author’s reputation. We also make sure any steps we follow are safe and legal. This helps us avoid dangerous IMEI changes while we look for ways to fix our Samsung devices.

    Manufacturer Customer Service

    We suggest contacting Samsung US support for help. You can call, chat, or visit an authorized service center. They have the tools to diagnose and fix hardware and software problems that cause IMEI loss.

    Before reaching out, gather your device model, any visible IMEI, proof of purchase, and warranty details. This information helps the technicians decide if a repair or official restore is needed. They can also tell you if you need to reactivate your device with the carrier.

    Useful Links for Further Assistance

    We use trusted firmware archives and carrier pages for official files and activation help. Sites like SamMobile and Firmware.mobi list stock firmware and model-specific builds for clean restores. Carrier support pages have policies and checks for devices with network not registered issues.

    If a carrier flags your device after an IMEI restore, contact them. They can guide you through the registration steps and any account requirements. Working with both manufacturer resources and carrier support helps speed up the recovery process and reduces downtime.

    Resource What We Get When to Use
    XDA Developers Model-specific guides, logs, firmware links When looking for community-tested recovery steps
    Reddit (r/GalaxyS, r/Samsung) User reports, step-by-step experiences To validate real-world outcomes before trying a fix
    Samsung US Support Official diagnostics, authorized repairs, warranty service For secure repairs and when hardware faults are suspected
    SamMobile / Firmware.mobi Stock firmware downloads and version histories When performing an official firmware restore to avoid IMEI issues
    Carrier Support Pages Activation procedures and IMEI registration policies If device shows network not registered support after restoration

    Conclusion: Regaining Mobile Functionality

    We’ve shown you how to fix IMEI problems so you can use your phone again. First, check if your IMEI is null or baseband unknown. Then, try simple fixes like restarting your phone, checking the SIM, and looking at network settings.

    If these steps don’t work, try re-registering your device and checking the IMEI. For Samsung phones, use Samsung Smart Switch or Odin to fix the modem and system images. If all else fails, get help from an authorized service to avoid legal issues and keep your warranty.

    Our first steps to fix Samsung IMEI issues are safe and easy to reverse. We advise against changing your device’s identifiers. Instead, follow steps to reinstall official firmware and keep EFS/NVRAM data safe. This keeps your device working right and follows carrier rules.

    To avoid problems in the future, back up your device’s data and write down the original IMEI before making any changes. Always use official firmware and keep your software up to date. These steps help prevent problems, reduce the risk of network errors, and make fixing issues easier and more reliable.

    FAQ

    What does “IMEI null” or “IMEI: unknown” mean after changing Samsung firmware?

    IMEI null means your phone’s International Mobile Equipment Identity is gone. This happens when firmware changes mess up the modem or EFS data. Your device might show “baseband: unknown” and can’t connect to networks.

    What common actions during flashing cause IMEI to disappear?

    Flashing the wrong firmware or interrupting the process can cause IMEI loss. Using bad EFS backups or wrong PIT files also leads to problems. Faulty tools or incorrect modem packages can corrupt the EFS/NVRAM.

    What immediate signs tell us the phone has an IMEI null problem?

    Look for no mobile signal, “No service,” or “IMEI: null” in Settings. *#06# should show your IMEI, but it might be blank. You might see “network not registered” errors and can’t send SMS or use data.

    What basic troubleshooting steps should we try first?

    First, try a full power off and restart. Check SIM and network settings. If these steps don’t work, you might need more advanced fixes.

    Can we re-register the IMEI ourselves using dialer codes?

    Dialer codes can show your IMEI, but they can’t rewrite it. To fix IMEI, you need an EFS backup or special tools. Always follow the law and only restore the original IMEI.

    How can Samsung Smart Switch help restore IMEI or baseband?

    Smart Switch can install official firmware and fix software issues. It’s good for those who don’t want to use manual tools. Make sure your device is recognized by the PC and supported by the software.

    When should we use Odin, and what parts are critical to fix baseband unknown?

    Use Odin to install Samsung firmware. Flashing the right CP (modem) and fixing the EFS partition are key. Use model- and region-specific firmware and follow tested procedures carefully.

    If Odin or Smart Switch doesn’t work, when should we seek professional help?

    Go to a Samsung service center if DIY tools fail. They can handle hardware issues and warranty checks. Authorized technicians have the tools to safely fix your device.

    How can we verify IMEI restoration after repair attempts?

    Check Settings > About phone and dial *#06#. Make sure the IMEI matches the original. Also, verify the Baseband version and network registration.

    What documentation should we keep to help restore IMEI if it’s lost?

    Keep the original IMEI from the box or carrier account. Back up your data and EFS/NVRAM before firmware changes. These backups help with legitimate restoration.

    Are there legal or warranty risks when attempting to restore IMEI?

    Yes. Changing IMEI to hide identity is illegal. Restoring a lost IMEI is okay, but be careful with unofficial tools. Always contact Samsung support before risky actions.

    How can we avoid IMEI null problems in the future?

    Use official OTAs and avoid unofficial ROMs. Verify firmware matches your device before flashing. Back up EFS/NVRAM and data before changes. Be aware of warranty implications when unlocking or rooting.

    Where can we find reliable firmware and community guidance for Samsung devices?

    Check Samsung’s support pages, SamMobile, and Firmware.mobi for firmware. XDA Developers and Reddit communities offer community help. Always verify the reputation of guides and avoid illegal services.

    What costs should we expect if we take the phone to a service center?

    Costs vary. Warranty repairs might be free for official update issues. Out-of-warranty repairs can cost more. Contact the service center for estimates.