Author: galaxyfirmware

  • Complete Guide to Installing Samsung USB Drivers on Windows 10 & 11

    Complete Guide to Installing Samsung USB Drivers on Windows 10 & 11

    This guide is for U.S. readers who want to connect Samsung devices to their PCs. It covers file transfers, ADB, ODIN, and backups. It works for both Windows 10 and Windows 11, so you can find the right driver for your system.

    We show you how to find your Windows version and download the Samsung USB drivers. You’ll learn how to check if the drivers are compatible and signed. We walk you through installing drivers on each OS, preparing your device, and choosing the right connection mode.

    Updating and uninstalling drivers are also covered. We offer troubleshooting tips based on Microsoft and Samsung Support. Always download from trusted sources, create a system restore point, and keep Windows up to date.

    Follow our steps to set up a reliable Samsung driver on Windows 11 or Windows 10. This way, you can connect your Samsung device to your PC without issues.

    Key Takeaways

    • We explain how to identify Windows 10 or Windows 11 before installing drivers.
    • Download the Samsung mobile driver from official Samsung support or trusted sources.
    • Create a system restore point and verify driver signatures for safety.
    • We provide OS-specific installation steps and connection mode guidance (MTP vs. PTP).
    • Instructions include updating, uninstalling, and troubleshooting Samsung USB drivers Windows 10 & 11.

    What are Samsung USB Drivers?

    We explain how Samsung USB Drivers help Windows talk to Samsung phones and tablets. These drivers have special .inf files that help Windows recognize the device. They also make sure tools like Smart Switch and Odin work well.

    USB drivers do more than just copy files. They create a way for hardware and the operating system to talk. This makes sure files transfer correctly and devices show up in Device Manager.

    Importance of USB Drivers for Samsung Devices

    Drivers are key for the PC to see a phone as a media device or developer endpoint. Without the right driver, Smart Switch and Odin won’t work. Good drivers also prevent data loss during transfers.

    How USB Drivers Facilitate Connectivity

    Drivers map the device to the right Windows class and register IDs. This lets the OS load the right handlers. We can then connect Samsung to PC for file transfers and updates.

    Common Issues Without USB Drivers

    Without drivers, devices might show up as Unknown USB Device. This can cause failed transfers and error messages. It’s a big problem for backing up photos and updating firmware.

    We see how important it is to have the right Samsung USB Driver. It keeps our connections stable and prevents data loss.

    Checking Your Windows Version

    Before we install drivers, we need to know which Windows version our PC has. This step is crucial to avoid installing the wrong package. It also prevents driver-signing conflicts with a Windows 11 Samsung driver or a Samsung USB Driver for Windows 10.

    How to identify Windows 10 or 11

    Open Settings, then go to System, and click About. The About page shows the Edition, Version, and System type. We can also press Win + R, type winver, and press Enter to see the exact OS edition and build number. These quick checks help us identify Windows version in minutes.

    Visible differences for visual confirmation

    Windows 11 has centered taskbar icons and a new Start menu. Windows 10 has the Start menu at the left with a familiar look. Spotting these differences helps less technical users confirm their OS before we proceed.

    Why knowing the OS matters

    Choosing the correct driver is key to avoid installation failures. A Samsung USB Driver for Windows 10 may not work on Windows 11 because of driver signing and Secure Boot rules. When we identify Windows version, we cut troubleshooting time and pick installers that match our system type.

    32-bit vs 64-bit guidance

    The About page shows System type. Most Samsung tools and drivers now require 64-bit Windows. We must download a 64-bit package when About reports x64-based processor. Installing a 32-bit driver on a 64-bit OS leads to incompatibility.

    Windows updates and driver conflicts

    Windows Update sometimes supplies built-in drivers that conflict with vendor packages. If we check Windows 11 build and recent update history, we can decide whether to keep the Windows-supplied driver or install the Windows 11 Samsung driver from Samsung. Knowing the build helps us resolve such conflicts faster.

    Quick checklist

    • Open Settings > System > About to identify Windows version and System type.
    • Use Win + R, type winver, press Enter to view build and edition.
    • Look for centered taskbar icons to confirm Windows 11 visually.
    • Choose Samsung USB Driver for Windows 10 only if About shows Windows 10.
    Check Where to Look What to Download
    Edition & Build Settings > System > About or winver Select driver matching edition and build notes
    System type Settings > System > About Download 64-bit driver for x64-based systems
    Visual cues Taskbar and Start menu Confirm whether we should seek a Windows 11 Samsung driver or a Windows 10 package
    Windows Update status Settings > Update & Security Decide if we keep Windows-supplied driver or install vendor driver

    Downloading Samsung USB Drivers

    We will show you where to find drivers, how to check if they’re right for you, and when to use community sites. Getting the right drivers makes connecting Samsung devices to PCs easy and avoids problems.

    Official Samsung Driver Sources

    Start at Samsung Support and the Smart Switch or Kies download pages for official drivers. The Samsung Developers site has ADB and Odin drivers for more complex tasks. Microsoft Update Catalog offers digitally verified packages.

    Verifying Driver Compatibility

    Before installing, check the driver’s name, version, and release date. Look at the digital signature in Properties > Digital Signatures. Also, make sure the supported OS list matches your system.

    For extra safety, compare the device’s Vendor ID (VID) and Product ID (PID) with the driver details. When downloading for Windows 11, choose packages labeled for Windows 10/11 and 64-bit.

    Alternative Driver Sources: Pros and Cons

    Community sites like XDA Developers or OEM mirrors may have older or patched installers. They can help if official drivers lack legacy support.

    But, third-party sites might offer unsigned or modified files. This can lead to malware, instability, and voiding your warranty. Always scan non-official downloads with antivirus and back up your system before installing.

    If you need drivers from unofficial sources, weigh the urgency against the risks. Always use HTTPS downloads, check signatures, and have device backups ready.

    Installing the Samsung USB Driver

    Before starting, make sure to do a few things. Close any running apps like Smart Switch or Kies. Also, disconnect your Samsung device. Create a Windows restore point and check if Windows is updated. Lastly, confirm you have admin rights.

    This gets your system ready for a smooth install of the Samsung USB Driver. It also ensures a clean connection to your PC.

    Step-by-Step Installation for Windows 10

    First, run the Samsung USB Driver installer (.exe) as an Administrator. Right-click the file and choose Run as administrator. Then, follow the prompts and agree to the driver installation.

    If the installer asks for a reboot, restart your PC. After rebooting, reconnect your Samsung device. Open Device Manager and check if your device shows up under Portable Devices as Samsung or as an MTP device. If it does, the installation is complete.

    Step-by-Step Installation for Windows 11

    For Windows 11, run the installer as Administrator and accept the prompts. Be careful with driver signing and SmartScreen messages during the installation.

    If SmartScreen blocks the installer, but you trust the source, click More info and Run anyway. Verify the digital signature. If driver enforcement stops installation, go to Settings > Update & Security > Recovery. Review advanced startup options for driver enforcement settings. Reboot and reconnect your device, then check Device Manager to confirm the driver is listed.

    Troubleshooting Installation Issues

    If Device Manager shows an unknown device, right-click it and choose Update driver > Browse my computer for drivers > Let me pick from a list. Then, select the Samsung .inf file. This usually fixes recognition problems during installation.

    If the installer fails, use the Windows Update Catalog to find signed driver packages. Install those versions. If older Generic MTP entries cause issues, remove them from Device Manager before trying again. For advanced users, temporarily disable driver signature enforcement, install the driver, and then re-enable enforcement after a successful install.

    If direct installers still fail, use Samsung Smart Switch or Kies as alternative installers. These tools include necessary drivers and can make the installation process easier.

    Connecting Your Samsung Device

    We show you how to link Samsung phones to a Windows PC. This is for moving files, debugging, or syncing media. Make sure your Samsung mobile driver connection is strong for a smooth Windows 11 Samsung driver connection.

    Get your phone ready before connecting. Make sure it’s unlocked and the screen is on. For ADB or advanced tools, turn on Developer Options. Go to Settings > About phone > Software information and tap Build number seven times. Then, open Settings > Developer options and turn on USB Debugging.

    When a USB prompt shows up on your phone, accept the “Allow this device” request. If it only charges, change the connection mode to File Transfer. This helps the Samsung USB Driver find your device and connect well.

    Use a good cable for the best results. An original Samsung cable or a high-quality data-capable USB cable is best. Cheap cables might only charge and won’t transfer data. Make sure the cable fits your PC port well.

    Don’t use USB hubs at first. Plug the phone directly into a PC USB port, like a USB 3.0 port for faster transfers. Check the battery level before big transfers. Keep it above 20% and don’t let the phone sleep to avoid problems.

    Know the connection modes to choose the right one. MTP, Media Transfer Protocol, is good for general files and media. It makes the phone a portable media player, perfect for copying music, videos, and documents.

    PTP, Picture Transfer Protocol, makes the phone a camera. Use PTP for photo import tools or if MTP causes issues. For most tasks, MTP is better for connecting Samsung to PC and using the Samsung USB Driver for smooth transfers.

    If Windows 11 Samsung driver can’t find your device, try a different USB port and replug the cable. Restart your PC and phone if it doesn’t work. Reinstall or update the Samsung USB Driver from official sources to fix the connection.

    Updating Samsung USB Drivers

    Keeping drivers up to date helps avoid connectivity and performance issues. We’ll talk about when to update, how to find new versions, and how to safely update Samsung USB drivers on Windows.

    update Samsung USB Driver

    When to Update Your Drivers

    Update drivers when Windows gets a big update, like switching to Windows 11. Also, after a Samsung firmware update that makes your device not recognized. If you keep getting disconnected, transfers are slow, or you notice new ADB features, it’s time for an update.

    How to Check for Updates

    First, check Samsung Support for driver updates and read the release notes. Smart Switch and Kies will also ask for updates. If they match your OS, follow their prompts.

    Use Device Manager too: right-click the device, choose Update driver, and pick Search automatically or Browse my computer.

    For signed packages, look at the Microsoft Update Catalog. Check the driver date and version there. This helps avoid installing the wrong or unsigned packages that can cause problems.

    Steps to Update Your Drivers Properly

    Before making any changes, back up your important files and create a system restore point. Read the release notes to see if you need to uninstall older drivers.

    Uninstall old drivers in Device Manager if needed. Then, download the latest official installer and run it as Administrator. After installing, reboot and reconnect your device to check if it’s recognized.

    If issues still exist, go back to the previous driver version in Device Manager. Don’t use third-party automatic updaters that might install the wrong drivers. Always check digital signatures and make sure the driver is compatible with your Windows version before updating.

    Common Connection Issues and Fixes

    Simple problems can stop your phone and PC from connecting smoothly. Signs include devices not showing up in File Explorer, being labeled as Unknown Device, or disconnecting often. These issues usually stem from cable or driver problems, not hardware failures.

    To find the problem, we take a few steps. First, try different USB ports and a known good cable. Then, test the Samsung device on another computer to see if it’s a phone or PC issue. Open Device Manager to check for error codes and driver names. Use adb devices with USB debugging on to check ADB connectivity.

    When drivers don’t match, we remove the wrong entry in Device Manager and reinstall the official Samsung USB Driver. If Windows installs a generic driver, we choose the Samsung MTP driver manually. To stop automatic driver installs, we disable it in Control Panel > System > Advanced system settings > Hardware > Device Installation Settings.

    Some errors have specific fixes. For example, an “MTP USB Device” with code 10 or 52 might need a driver update or verification of driver signature. ADB not detecting a phone often means USB debugging is off or the device hasn’t authorized the PC. We also need to reinstall ADB drivers from Google or Samsung developer resources.

    Intermittent disconnections usually point to cable or port issues. We suggest using a different cable, a powered USB hub, or a direct motherboard port. Updating USB controller drivers in Device Manager can also help. Make sure the device mode is correct for Smart Switch or Odin: Download mode for Odin and MTP for Smart Switch. The right drivers are essential before firmware tasks.

    If problems persist, we seek professional help. Complex hardware faults, suspicious driver behavior, or firmware flashing need experts. Official Samsung service centers or experienced technicians can help avoid data loss or damage.

    We summarize practical fixes below for quick reference.

    Symptom Quick Checks Recommended Fix
    Device not shown in File Explorer Try different USB port and cable; check USB mode on phone Reinstall Samsung MTP driver; enable MTP on device
    Unknown Device in Device Manager Inspect error code and driver details Uninstall entry, install official Samsung USB Driver
    ADB does not list device Enable USB debugging; accept RSA prompt on phone Reinstall ADB drivers from Google or Samsung
    Frequent disconnects Test alternate cable and port; try powered hub Update USB controller drivers; use direct motherboard port
    MTP errors or code 10/52 Check driver signature and MTP components Update drivers, install Windows Media Feature Pack for N versions
    Smart Switch or Odin issues Verify device mode and driver presence Install correct Samsung mobile driver fixes and use proper mode

    Uninstalling Samsung USB Drivers

    When a Samsung phone won’t connect or acts strangely, we often need to remove the driver and start over. This is because of a bad or wrong driver, getting ready for a new driver, or fixing issues after a failed install.

    uninstall Samsung USB Driver

    Reasons for uninstalling

    We uninstall Samsung USB drivers when the device shows up as an Unknown USB Device in Device Manager or when transfer modes fail. Removing these files can stop errors and let us install a new driver cleanly.

    We also remove drivers before installing a new driver or when Samsung software like Smart Switch messes with connections. Making a restore point before we start helps avoid problems.

    Step-by-step uninstallation process

    We open Device Manager and find the Samsung entry under Portable Devices or the Unknown USB Device under Universal Serial Bus controllers. Right-clicking and choosing Uninstall device removes the entry.

    If the option appears, we check “Delete the driver software for this device” to fully remove driver files from the driver store. We repeat for related entries and uninstall companion apps like Smart Switch from Apps & features if they persist.

    After uninstalling, we reboot the PC to clear any leftover driver instances. When working on Windows 11 Samsung driver uninstall tasks, a reboot helps Windows stop reinstalling problematic drivers automatically.

    Reinstalling drivers after uninstallation

    After the reboot, we can let Windows try automatic installation, which may add a generic driver. To ensure a trusted package, we run the official installer as Administrator and reinstall Samsung USB driver from a known-good file.

    If Windows installs a problematic driver, we use Device Manager to update driver and point to the official driver folder or use the Microsoft Update Catalog to apply a signed version. We reconnect the device and confirm recognition. If needed, we re-enable USB debugging on the phone.

    We keep copies of tested installers on local storage or a USB drive for offline recovery. This makes it faster to reinstall when network access is limited and helps prevent repeat Windows 11 Samsung driver uninstall cycles.

    Conclusion: Seamless Connectivity with Samsung USB Drivers

    We covered how to connect Samsung devices to a Windows PC. First, check if your system is Windows 10 or 11. Then, download the right Samsung USB Driver or mobile driver for your OS.

    Follow the installation steps for your OS. Make sure your phone is ready with the correct USB cable and connection mode. Test the connection using MTP or PTP.

    It’s important to keep drivers updated to avoid connection issues. Check Samsung Support and Microsoft Update Catalog regularly for updates. Use Smart Switch or Samsung developer resources for advanced tools.

    If you have trouble connecting, try reinstalling the Samsung USB Driver. If that doesn’t work, do a clean uninstall and reinstall. For more help, visit Samsung Support, Microsoft Support, and XDA Developers. But be careful with third-party packages.

    Always check where you download from and back up your data before making any changes. If your hardware seems broken, contact a Samsung service center. Follow our steps to connect your Samsung device to your PC. Bookmark these resources to keep your drivers updated.

    FAQ

    What are Samsung USB drivers and why do we need them?

    Samsung USB drivers help Windows see Samsung phones and tablets. They let us transfer files, debug, and flash firmware. Without them, Windows might not recognize the device or block tools.

    How do we check whether our PC is running Windows 10 or Windows 11?

    Open Settings > System > About or press Win + R, type winver, and press Enter. This shows the exact edition and build. Windows 11 has a centered taskbar and updated Start menu.

    Where should we download Samsung USB drivers from?

    Get them from Samsung Support, Smart Switch/Kies download pages, and Samsung Developers. For signed packages, try the Microsoft Update Catalog. Always check digital signatures and scan for malware.

    How do we install Samsung USB drivers on Windows 10 and Windows 11?

    Download the official Samsung USB Driver installer and run it as Administrator. Follow the prompts and reboot if needed. On Windows 11, verify the digital signature before installing.

    Our PC shows “Unknown USB Device” or the device isn’t recognized. What should we do?

    Try a different USB cable and port. Connect directly to the PC, not through a hub. In Device Manager, update the driver to the Samsung MTP driver.

    What’s the difference between MTP and PTP, and which should we use?

    MTP is for general file transfers, while PTP is for photo import tools. Use MTP for most tasks and PTP when needed.

    How do we enable ADB or other developer features on our Samsung device?

    Enable Developer Options by tapping Build number seven times. Open Developer options and enable USB Debugging. Accept the authorization prompt on the device.

    When should we update our Samsung USB drivers and how do we do it safely?

    Update drivers after Windows upgrades or if issues arise. Use official sources and create a system restore point. Run the installer as Administrator.

    Can Windows Update install a conflicting driver and how do we prevent that?

    Yes, Windows Update might install a generic driver. Uninstall the conflicting driver and install the official signed package. Disable automatic driver installation in System > Advanced system settings.

    What cable should we use to connect our Samsung phone to a PC?

    Use the original Samsung cable or a high-quality data-capable cable. Avoid damaged cables and connect directly to a PC USB port.

    How do we uninstall Samsung USB drivers cleanly?

    Open Device Manager, locate the Samsung device, right-click, and choose Uninstall device. Reboot the PC and reinstall the official driver package.

    ADB doesn’t list our device. What troubleshooting steps should we follow?

    Confirm USB Debugging is enabled and the device has authorized the PC. Try different cables and ports, verify the installed ADB drivers, and run adb kill-server then adb start-server.

    Are there risks to disabling driver signature enforcement to install Samsung drivers?

    Disabling driver signature enforcement can increase security risk. Use this only as a last resort and with trusted drivers. Re-enable driver signature enforcement after installing.

    Where can we get further help if driver or connection issues continue?

    Start with Samsung Support and Microsoft Support. Use official tools and the Microsoft Update Catalog for signed packages. For device-specific issues, try XDA Developers, but proceed cautiously.

  • How to Revive a Completely Dead Samsung Phone (Hard Brick vs Soft Brick)

    How to Revive a Completely Dead Samsung Phone (Hard Brick vs Soft Brick)

    We provide a clear guide for those trying to bring dead Samsung phones back to life. We explain the difference between hard brick and soft brick. Our site often talks about Samsung FRP bypass and removing Google account locks. But, many steps to recover a dead phone are similar to those for unlocking.

    A hard brick shows no signs of life and can’t enter boot, download, or recovery modes. A soft brick still shows some life, like bootloops or error messages. Knowing which brick type you have is key because fixing methods vary.

    This article covers definitions, common causes, and how to diagnose and fix both hard and soft bricks. We also discuss Samsung FRP bypass, removing Google account locks, and when to get professional help. We include tips on how to prevent problems, warranty options, and a quick summary.

    We stress the importance of following the law and ethics. Only try to bypass FRP or unlock Samsung phones on devices you own or have permission to fix. Trying to bypass protections on stolen devices is illegal and wrong.

    Key Takeaways

    • Hard brick shows no power or mode access; soft brick still boots to recovery or errors.
    • Many revive dead Samsung phone steps overlap with Samsung FRP bypass techniques.
    • Determining brick type is essential before attempting to unlock Samsung phone or remove Google account Samsung locks.
    • Always follow legal and ethical limits when performing FRP bypass or repairs.
    • We will cover diagnostics, fixes, and when to seek professional repair in the following sections.

    Understanding Phone Bricking: Hard vs. Soft

    Phones can stop working after a bad update or a risky change. We explain the difference between a hard brick and a soft brick. We also talk about common signs of bricked devices and how security locks like FRP can affect recovery.

    A hard brick means the phone is completely dead. It won’t turn on, and a PC won’t recognize it. This can happen if the bootloader gets corrupted or if there’s a serious hardware problem. Repair centers might use special tools to fix a hard brick Samsung.

    A soft brick is when the phone won’t work but can be fixed. It might show the Samsung logo and then freeze. This can happen if an update goes wrong or if the system files get messed up. A soft brick Samsung can usually be fixed by reflashing firmware or wiping caches.

    We have a checklist to help you figure out if your phone is bricked.

    • Completely dark screen with no response to charger or key combos — classic hard brick symptom.
    • Samsung logo stuck, endless bootloop, or repeated recovery menu access — typical soft brick signs.
    • “No Command” screen or Android error messages while booting — indicates software-level failure.
    • Inability to enter Download Mode or Recovery Mode after trying Power + Volume Down + Home/Bixby — suggests a deeper problem, possible hard brick.
    • Device recognized by PC only at low-level debug interfaces but not in normal modes — repair centers can sometimes use that to diagnose a hard brick Samsung.

    Trying to reset or reflash firmware can trigger factory reset protection. If FRP activates, you might need to bypass it or enter original account details to unlock your Samsung phone. Always confirm ownership and follow the right steps to unlock a Samsung phone with FRP.

    Common Causes of Bricking a Samsung Phone

    Bricking can happen in many ways. We’ll cover the main reasons so you can avoid them.

    Software issues are a big problem. An interrupted update, the wrong firmware, or a custom ROM can mess up your phone. A bricked phone might not show a logo or keep restarting.

    Official updates rarely cause problems. But, losing power or dropping the connection during an update can brick your phone.

    Software Updates Gone Wrong

    Updates gone wrong can mess up your phone. This includes interrupted OTA transfers and the wrong firmware. Flashing the wrong bootloader can also cause issues.

    When you restore your phone to factory settings, you might face a problem. Factory Reset Protection can block access unless you remove your Google account first. Or, you need to verify your account after the reset.

    Faulty Apps and Malware

    Apps with too much power can harm your phone. They might overwrite system files or add bad modules. Be careful when installing apps, especially from unknown sources.

    Malware can also cause problems. It might target the boot chain or install services that stop your phone from starting. Always be careful with apps and avoid those from unknown sources.

    Hardware Failures

    Hardware issues can look like a brick. A swollen battery, a bent charging port, or water damage can stop your phone from turning on or charging.

    Storage problems are another issue. Corrupted eMMC or UFS, or a damaged controller, can make your phone unbootable. Sometimes, a hardware problem might show up after trying to fix software issues.

    Cause Typical Symptom Immediate Action
    Interrupted OTA or wrong firmware No boot logo, boot loop, download mode only Attempt reflash with correct stock firmware; confirm model/region
    Malicious app or unsafe apps Slow boot, repeated crashes, services fail Boot to safe mode; uninstall suspicious apps; avoid side-loading
    eMMC/UFS corruption Device not recognized by PC, storage errors Professional diagnosis; possible board-level repair
    Battery, port, or water damage No power, intermittent charging, visible corrosion Inspect port, try known-good charger; seek repair if damage seen
    Reflash without removing account Locked after restore by FRP Verify or remove Google account Samsung before reset; keep credentials

    Initial Steps When Your Samsung Phone Won’t Turn On

    When a Samsung phone won’t turn on, it might seem like it’s dead. But often, it’s just a simple power or software problem. We’ll show you three easy checks to find out what’s wrong before you try more complicated fixes. These steps are quick, safe, and help keep your data safe.

    Try a Different Charger and Cable

    First, check if the power is working. Use a Samsung-certified charger and cable to avoid any issues. Try charging from a wall outlet and a computer USB port, as they have different voltages.

    Let the phone charge for 15–30 minutes if the battery was empty. USB-C and fast-charge adapters can sometimes hide problems. A bad cable or socket might look like a dead phone. If a different charger works, you’ve solved the problem without needing advanced tools.

    Force a Restart

    Force-restart can fix chips that get stuck. For many Galaxy phones, press Power + Volume Down for 10–20 seconds. For phones with a Home or Bixby key, use Power + Volume Down + Home, or Power + Volume Down on newer models.

    This can bring back devices in soft-brick states without losing data. If the phone shows emergency screens, be careful not to get stuck in Emergency Mode. Try the force restart first before trying recovery or download modes.

    Check for Physical Damage

    Look for any damage on the phone’s frame, screen, and ports. Check the SIM tray area for signs of water damage. Remove the SIM and microSD card and try to boot without them.

    Watch out for a swollen battery or loose screen connectors. If you see corrosion or a bulging battery, stop and get professional help. Further powering or DIY disassembly can be dangerous and make things worse.

    Quick next-step checklist:

    • After charging and force restart, try to access Recovery Mode (Power + Volume Up + Home/Bixby).
    • If Recovery Mode fails, try Download Mode (Power + Volume Down + Home/Bixby) to help diagnose soft vs hard brick.
    • If you reach a boot screen but cannot unlock Samsung phone due to account locks, avoid multiple failed attempts; bypass FRP requires verified steps from Samsung or an authorized service.
    Step Action Why it Helps
    1 Try a Different Charger Samsung-certified Rules out faulty cable or adapter that blocks charging and mimics a dead device
    2 Force Restart Samsung Resets the SoC to clear temporary software hangs without data loss
    3 Inspect for Physical Damage Detects water, swelling, or connector issues that require professional repair
    4 Attempt Recovery or Download Mode Helps determine whether we face a soft brick or a deeper hardware fault
    5 Check for Locking Issues If device boots but we cannot unlock Samsung phone, do not guess credentials; bypass FRP steps must be handled carefully

    Diagnosing a Hard Brick Situation

    When a Samsung phone seems dead, we start with simple checks. A PC and USB cable can show if it’s still alive at a basic level. If it shows any sign of life, we might avoid expensive repairs.

    diagnosing hard brick Samsung

    We use a good USB cable and a Windows PC for testing. Device Manager shows if the phone is recognized. If it’s seen as a Samsung device or an unknown device, there’s hope for fixing it.

    If it doesn’t show up or only appears as unknown hardware, it might be a hard brick. Or it could have a serious hardware problem.

    Identifying Symptoms

    Look for signs like no LED light, no vibration, and no boot animation. If you can’t get to recovery or download screens, it’s a bad sign. Repeatedly trying to use the power and volume keys without response means the bootloader or mainboard is likely damaged.

    Testing with a PC is key. If the device never shows up in Device Manager, it’s likely a hard brick. But if it’s briefly detected or listed as unknown, there’s still hope to recover it.

    Using Download Mode

    Download mode Samsung, or Odin mode, lets us flash stock firmware. To get there, power off the phone and press Volume Down + Home/Bixby + Power for older models. For newer models, use Volume Down + Power. Press Volume Up to confirm when prompted.

    If the phone enters download mode, it’s not hard-bricked. We can then use Odin or Samsung Smart Switch to fix it. If it can’t enter download mode and stays dead, it needs more serious help.

    Seeking Professional Help

    Stop DIY efforts if the device shows clear signs of a hard brick or has visible damage. If it’s never recognized by a PC, even after trying download mode, seek professional help. Go to authorized Samsung Service Centers or reputable repair shops for board-level repairs.

    Board-level repairs can be risky and expensive. Before going, document symptoms and gather device details. IMEI and serial numbers are often on the SIM tray or original box. Bring purchase receipts or account proof to help unlock features and avoid FRP holds.

    When technicians reflash firmware or replace storage, FRP may trigger. To speed up the process, have ownership proof ready. If unlocking or bypassing FRP is needed, authorized centers and Samsung support can verify ownership and complete the task.

    Fixing a Hard Brick Samsung Phone

    When a Samsung device won’t turn on, we take careful steps to fix it. Success depends on the model, if it can enter Download Mode, and if we have the right tools. We’ll show you three ways to fix it, along with important safety tips.

    Using Samsung Smart Switch revive

    Samsung Smart Switch has a special function to revive bricked phones. It works if the phone can enter Download Mode or is recognized by the app. First, we install Smart Switch on a computer, then follow the app’s instructions.

    This method is safe for recent Samsung models. But, it won’t work if the phone can’t enter Download Mode or if there’s hardware damage.

    Flashing stock firmware Samsung

    If Smart Switch can’t fix the phone, we try flashing official firmware. We use Odin on Windows and get the right firmware from official sources. Before starting, we install Samsung USB drivers and put the phone in Download Mode.

    In Odin, we load the necessary files and start the flash. But, be careful not to choose the wrong firmware, as it can cause permanent damage. Flashing may also void your warranty and won’t always remove FRP.

    Utilizing ADB Fastboot Samsung

    Most Samsung phones use Odin, but ADB can still be helpful. We check if the phone connects with ADB, then use it to apply OTA zips or pull logs and backups. Fastboot commands are used in rare cases where the bootloader is unlocked.

    But, ADB access is usually blocked in hard bricks. These tools are better for soft-bricks. Always follow the law and have proof of ownership when trying to remove Google account or bypass FRP.

    We stress the importance of keeping your data safe and following the law. These steps can erase your data and require precise firmware. If you’re worried about your data or if the phone has hardware issues, seek professional help or authorized Samsung repair services.

    Understanding Soft Brick Issues

    When a Samsung phone stops booting but still shows signs of life, it might be a soft brick Samsung case. These issues often happen after a failed ROM flash, an interrupted update, or an incompatible mod install. Knowing the right checks helps us choose the safest repair path.

    soft brick Samsung

    We list common symptoms soft brick cases present so we can spot them quickly and avoid unnecessary repairs.

    Symptoms of a Soft Brick

    • Bootloop where the Samsung logo repeats without reaching the home screen.
    • A “No Command” screen or a frozen Android logo during boot.
    • Constant app crashes or the device failing to load the Android UI.
    • Unable to boot to Android while still able to enter recovery or download mode.

    Next, we verify if recovery access is available. This determines our options and reduces risk to user data.

    Assessing Recovery Mode Access

    • Power off the device fully.
    • Press and hold Volume Up + Power + Home or Bixby, depending on model, until the recovery menu appears, then release.
    • If recovery mode Samsung is reachable, we can wipe cache, sideload updates, or perform a factory reset from that menu.
    • If only Download Mode is accessible, reflashing stock firmware with Odin remains a reliable route.

    We try low-risk steps before moving to full restores. Temporary measures often restore function and preserve data.

    Temporary Solutions

    • Boot into Safe Mode by holding Volume Down during boot to check for third-party app conflicts.
    • Use ADB to pull logs if USB debugging is enabled so we can diagnose crashing services.
    • Uninstall recently added apps or remove updates to system apps while in Safe Mode.
    • Boot into recovery mode and wipe the cache partition; this often clears bootloops without data loss.

    We must note that a factory reset can trigger FRP. If we need to bypass FRP later, we should plan for legitimate bypass FRP methods and have original Google account credentials ready when possible.

    Issue How to Check Risk to Data Quick Fix
    Bootloop Observe Samsung logo repeating during startup Low if cache wipe succeeds; high if factory reset required Wipe cache partition, boot to Safe Mode
    No Command / Frozen Boot Reaches Android recovery prompt or shows “No Command” Low to moderate Sideload OTA or wipe cache
    Only Download Mode Accessible Device boots to Download Mode instead of recovery Moderate; reflashing can overwrite data Flash stock firmware via Odin
    App Crashes / Instability Device boots but apps fail often Low Boot Safe Mode, uninstall problem apps
    Post-reset FRP Lock Device asks for previous Google account after reset High if credentials unknown Prepare documentation or plan for legitimate bypass FRP support

    Fixing a Soft Brick Samsung Phone

    When a Samsung phone gets stuck in bootloops or shows only the logo, we start with recovery options. These steps can save time and data. We’ll show you safe ways to fix soft brick Samsung devices. Each method is designed to get your device working again without risk.

    Wiping the cache partition helps by removing temporary system files that can cause boot issues. To wipe cache partition on Samsung devices:

    • Power off the phone completely.
    • Boot into Recovery Mode using the correct key combo for the model.
    • Use the Volume keys to highlight “Wipe Cache Partition.”
    • Press the Power key to confirm and wait for completion.
    • Select “Reboot system now.”

    Clearing the cache can fix bootloops and slowdowns without losing personal files. It’s a good first step before more drastic measures.

    Performing a factory reset is the next step if cache clearing doesn’t work. A factory reset will erase apps, settings, and accounts. Be aware that it may trigger Factory Reset Protection.

    • Back up photos and important files if possible before proceeding.
    • Enter Recovery Mode again and choose “Wipe data/factory reset.”
    • Confirm with the Power key and allow the process to finish.
    • Reboot the device; the first boot can take several minutes.

    After a reset, you might need to sign in with your Google account. If you can’t remember your credentials, the device will stay locked by FRP.

    Reinstalling software via recovery mode is good for fixing damaged system files. We recommend using manufacturer-supplied packages and verified firmware signatures to avoid issues.

    1. Download the official OTA or firmware ZIP for the exact model and build.
    2. Boot the phone into Recovery Mode and select “Apply update from ADB” or the microSD option when supported.
    3. For ADB sideload: connect the device to a PC, open a command prompt, and run adb sideload <filename.zip&gt.
    4. Wait for the sideload to finish, then choose “Reboot system now.”

    If reinstalling via recovery fails, try Download Mode and Odin to flash official firmware. Only use Odin if you follow model-specific instructions and use Samsung packages.

    FRP is important when doing a factory reset or reinstalling system images. If you can’t remember your Google account, use legal ways to recover it. This includes account recovery via Google, Samsung account support, or verified repair services. Avoid unverified bypass tools as they can break terms of service and local laws. Always choose legal, account-based solutions.

    When to Seek Professional Repair Services

    A dead Samsung can seem like a lost cause. But, before you give up, check this guide. It tells you when to get expert help and how to pick a reliable shop. The right service can protect your data and keep your warranty intact.

    Signs You Need Expert Help

    If your device is hard-bricked and won’t turn on, stop trying DIY fixes. It’s time to seek a professional Samsung repair. If Download and Recovery modes are out of reach, software tools can’t help. Physical or water damage usually means hardware problems that need expert hands.

    Dealing with eMMC or UFS corruption, faulty components, or needing data recovery is beyond simple fixes. If you’re unsure about firmware flashing or lack the right tools, it’s time to call for help.

    Finding Authorized Samsung Repair Shops

    Choosing an authorized Samsung service means you get real parts and skilled techs. These centers use official tools and follow verified FRP removal steps. This keeps your warranty safe and avoids fake parts.

    Find service centers through Samsung’s support, carrier stores, or Best Buy/Geek Squad partners in the U.S. For independent shops, check customer reviews, verify tech credentials, and ask about parts before you decide.

    What to Expect from the Repair Process

    The repair process starts with device intake and a diagnostic check. You’ll get a cost and time estimate before work begins. Tasks include reflashing firmware, replacing parts, swapping batteries or screens, and fixing water damage.

    Diagnostics might cost extra, and manufacturer repairs take days. There’s a risk of data loss in many repairs. Authorized Samsung services will ask for proof of ownership before unlocking features or bypassing FRP. They won’t remove FRP for stolen devices.

    Independent shops might offer faster service or lower prices, but their trustworthiness varies. Keep receipts, IMEI, and account info to speed up service. Clear records help when proving ownership or getting parts.

    Issue Best Option Why Expected Time
    Hard-bricked, no mode access Authorized Samsung service Access to official tools and firmware, warranty safe 3–10 days
    Physical or water damage Board-level repair shop or authorized center Trained technicians, replacement parts, soldering capabilities 2–7 days
    eMMC/UFS storage failure Specialized data recovery lab Hardware-level recovery tools and cleanroom processes 5–14 days
    FRP lock with proof of ownership Authorized Samsung service Official FRP removal after identity verification 1–5 days
    Minor software corruption Local independent repair shop Often quicker and less costly for simple reflashes Same day–3 days

    Preventative Measures to Avoid Bricking

    We take care of our devices to avoid Samsung bricking and protect our data. Simple habits every day help prevent problems. Here are steps that fit into our daily lives and help fix issues.

    Regular updates keep the system stable.

    It’s important to update your device as soon as possible. This keeps it running smoothly and securely. Make sure your phone has enough battery and is connected to Wi-Fi before updating. This helps avoid any issues that might cause problems.

    For those who like to tinker, installing unofficial ROMs or beta firmware can be risky. Always follow specific instructions and make backups before trying anything new.

    Regular Software Updates

    We update our devices during times when we’re not using them much. We also check the download to make sure it’s correct. Following the manufacturer’s instructions helps avoid problems that can come from incomplete updates.

    Using Samsung Smart Switch for big updates adds an extra layer of protection. It helps us keep our data safe when we’re switching or restoring devices.

    Caution with Third-Party Apps

    We only get apps from trusted places like Google Play. We also check what permissions an app needs before we install it. This helps keep our device safe from harm.

    When trying out new apps, we always make a backup first. Reading guides specific to our device helps us avoid problems. This way, we can easily fix any issues that might come up.

    Backup Your Data Regularly

    We back up our data to Google account, Samsung Cloud, and our computers regularly. This way, we can quickly get back to where we were if something goes wrong. Smart Switch is great for backing up everything on our device before making big changes.

    It’s also important to enable Find My Mobile and check our Samsung account setup. This lets us remove accounts safely before selling or giving away our device. Removing accounts properly and doing a factory reset helps avoid problems with FRP locks.

    Preventative Action Why It Helps How We Do It
    Install official OTA updates Fixes bugs and patches vulnerabilities Update over Wi‑Fi with 50%+ battery or on charger
    Avoid unverified ROMs and betas Reduces chance of system corruption Use vendor ROMs or follow XDA/official guides with backups
    Limit app sources and permissions Prevents malicious or unstable apps Download from Google Play; review permissions before install
    Regular backups Ensures data recovery after resets or flashes Google backup for apps/settings, Samsung Cloud for contacts, Smart Switch to PC
    Account removal before transfer Prevents FRP lock and ownership disputes Remove Google account Samsung and Samsung account, then factory reset via Settings

    Warranty and Repair Options for Samsung Phones

    We explain how to check if your warranty covers your issue, estimate repair costs, and decide between DIY or professional repair. This guide helps you make an informed choice when your Galaxy device won’t start or has major problems.

    Checking Your Warranty Status

    First, we check your Samsung warranty on the manufacturer’s website. Just enter your IMEI or serial number to see what’s covered and when. Keep your receipts and the original box to prove coverage.

    It’s also wise to check with your carrier for any extra plans or insurance. Samsung Protect and carrier insurance like AT&T or Verizon offer accidental damage coverage for a fee. In the U.S., consumer protections can differ, so always read the fine print to understand what’s covered.

    Understanding Repair Costs

    We look at typical repair prices to help you budget. Replacing screens and batteries is usually the cheapest. But, motherboard and storage repairs cost more because they need advanced tools and parts.

    Repair prices for Samsung can change based on the model and where you are. Unauthorized repairs can void your warranty, making complex fixes riskier. Unlocking or removing FRP can also lead to extra fees and identity checks at official centers. The most expensive services include data recovery and JTAG-level repairs.

    DIY vs. Professional Repair: Pros and Cons

    We weigh the pros and cons of fixing your Samsung phone yourself versus getting it done by a pro. DIY can save money and teach you how to fix things yourself. But, it risks voiding your warranty, causing more damage, and losing your data.

    Professional repair keeps your warranty valid, uses trained technicians, and handles your data safely. The downsides are higher costs and longer wait times. We suggest professional help for serious issues or when you need to unlock your phone or bypass FRP.

    Repair centers won’t bypass FRP without proof of ownership. DIY FRP bypass tools are available, but they’re risky and may be illegal if used on devices you don’t own. We recommend DIY only if you’re experienced and have the right parts; otherwise, go for authorized service.

    Conclusion: Reviving Your Samsung Phone Safely and Effectively

    We’ve shown how to tell if your Samsung phone is hard-bricked or soft-bricked. Start with simple checks like using a different charger and trying a force restart. If that doesn’t work, try recovery or download mode.

    Tools like Samsung Smart Switch or Odin with the right firmware can help. But remember, wiping or reflashing can trigger FRP bypass protections. You might need the original Google or Samsung credentials to restore your phone.

    When fixing Samsung phones, start with simple checks and use official tools when you can. If your phone won’t turn on after these steps, it might have a hardware problem. In that case, you should get it checked by a pro.

    When dealing with account locks, don’t take risks. Remove the Google account settings before transferring data. Find legal ways to unlock your Samsung phone or solve FRP issues.

    For the last tips, always back up your phone and update its software on time. Avoid using unofficial firmware or rooting your phone unless you really need to. Keep your receipts and warranty info safe.

    Always go to authorized Samsung repair centers for big problems. Remember, Samsung FRP bypass and unlocking are only for devices you own or have permission to fix. Trying to bypass FRP without permission is risky and illegal.

    FAQ

    What is the difference between a hard brick and a soft brick on a Samsung phone?

    A hard brick means the phone shows no signs of life. It won’t turn on, and it won’t connect to a PC. This usually means there’s a serious problem that needs professional help.

    A soft brick, on the other hand, might turn on but keeps restarting. It could show error messages or get stuck in a loop. You can often fix a soft brick with special software.

    How do we tell whether our Samsung phone is hard-bricked or soft-bricked?

    First, try using a different charger and cable. Then, do a force restart by pressing Power and Volume Down for 10–20 seconds. If it responds or goes into Recovery or Download Mode, it’s soft-bricked.

    If it doesn’t respond at all and can’t connect to a PC, it’s likely hard-bricked. In this case, you might need a professional to diagnose it.

    Can Samsung Smart Switch fix a bricked phone?

    Samsung Smart Switch has a feature for emergency recovery. It can help if your phone is recognized by the software or can enter Download Mode. But, it won’t work for true hard bricks or serious hardware damage.

    Will reflashing firmware via Odin remove Factory Reset Protection (FRP)?

    Reflashing firmware with Odin doesn’t remove FRP. After a reset or firmware reinstall, you might still need the original Google account details. Only the device owner or with permission should try to bypass FRP. Authorized service centers can help after verifying ownership.

    What are safe first steps if our Samsung phone won’t turn on?

    Try a different charger and cable and charge the phone for 15–30 minutes. Do a force restart by pressing Power and Volume Down. Remove SIM and microSD cards and check for water damage or physical harm.

    If these steps don’t work, try to enter Recovery or Download Mode. This can help you figure out if it’s a soft or hard brick.

    How can we attempt to recover a soft-bricked Samsung without losing data?

    Try wiping the cache partition from Recovery Mode. Boot into Safe Mode to remove apps. Or use adb sideload for an official OTA update if possible.

    These steps might fix bootloops without losing your data. If not, you might need to reset the device or reflash firmware, which could erase your data.

    When should we stop DIY attempts and seek professional repair?

    Get professional help if your phone is hard-bricked and won’t turn on. If it shows physical damage, can’t be recognized by a PC, or has a suspected board-level fault. Also, seek help if you need to recover data or don’t have the right tools and firmware.

    Are there legal or ethical limits to bypassing FRP or unlocking a Samsung phone?

    Yes. You can only bypass FRP or unlock a phone if you own it or have permission. Trying to bypass FRP on a stolen or unauthorized device is illegal and wrong. Authorized repair centers will ask for proof of ownership before helping with FRP services.

    What tools are commonly used to fix bricked Samsung phones?

    Common tools include Samsung Smart Switch for emergency recovery, Odin for flashing firmware on Windows, and ADB for sideloading updates. Manufacturer or repair-shop diagnostic tools are used for board-level work. JTAG or eMMC programming tools are for severe hardware failures.

    How does hardware damage mimic bricking, and what should we check?

    Failing batteries, damaged charging ports, water damage, swollen batteries, or detached display connectors can look like bricking. Check for liquid-damage indicators, try different chargers and cables, and remove external cards.

    If you see corrosion or physical damage, stop trying to fix it yourself. Take the phone to a repair shop.

    Will fixing a bricked phone void the warranty?

    Unauthorized repairs or flashing unofficial firmware can void the warranty. Using official Samsung service centers or authorized partners keeps your warranty valid. DIY repairs or third-party modifications may void your warranty and increase the risk of further damage.

    How can we prevent bricking and FRP complications in the future?

    Keep your phone updated with official OTA releases. Make sure power and Wi-Fi are stable during updates. Avoid unofficial ROMs, unverified mods, or risky root permissions.

    Regularly back up your data with Samsung Cloud, Google Backup, or Smart Switch. Remove Google and Samsung accounts before transferring ownership to prevent FRP for the next user.

    If we need data recovery, what are our options when a device is bricked?

    For soft bricks, software recovery and careful flashing might save your data. For hard bricks due to storage failure, professional data-recovery services might help. But, this is expensive and not guaranteed. Always document IMEI/serial and provide proof of ownership when asking for data recovery.

    How do we find an authorized Samsung repair center or reputable third-party shop?

    Use Samsung’s official support site to find authorized service centers by entering IMEI or serial number. For third-party options, check carrier-authorized partners (like Best Buy/Geek Squad in the U.S.). Read verified customer reviews and verify technicians’ experience with board-level repairs.

    Ask about diagnostics fees, warranty on repairs, and proof-of-ownership requirements for FRP support.

  • The Evolution of Samsung’s Interface: From TouchWiz to One UI

    The Evolution of Samsung’s Interface: From TouchWiz to One UI

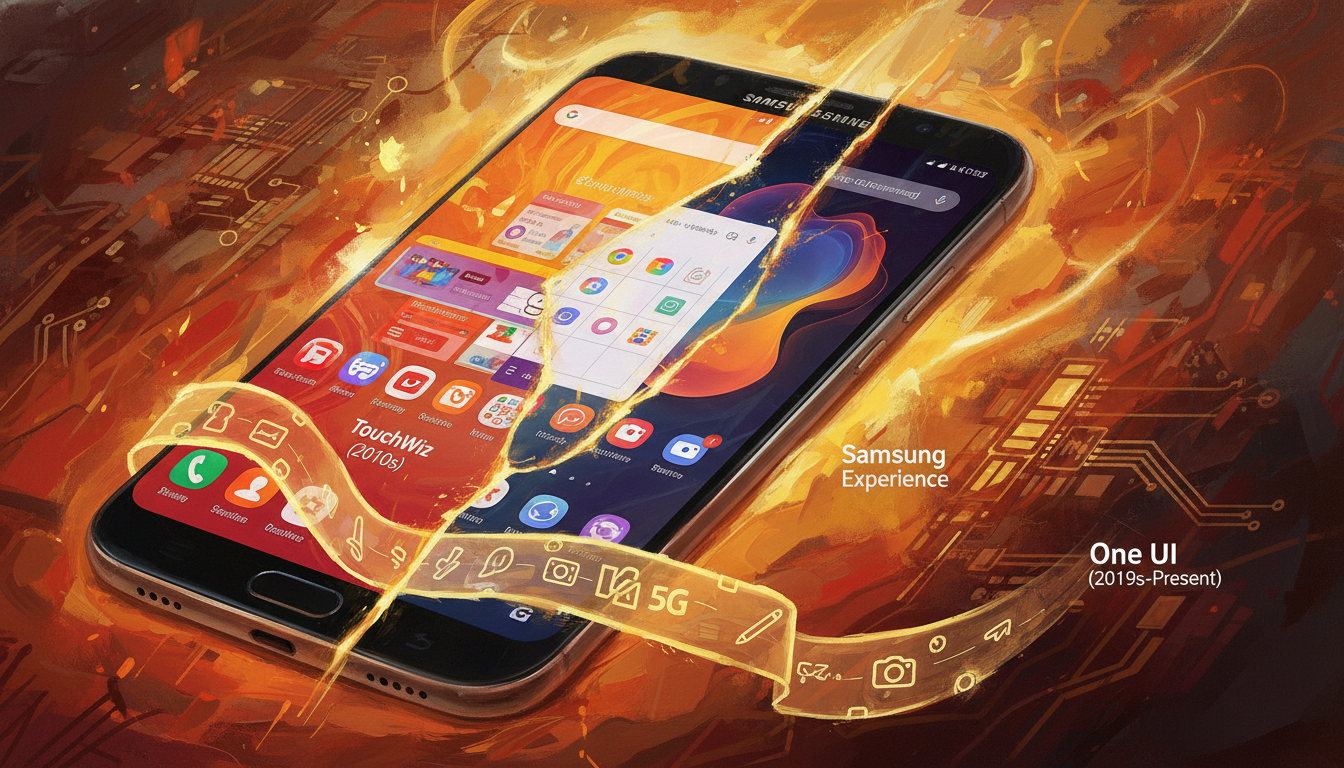
    We explore Samsung’s journey from TouchWiz to One UI. We focus on how these changes affect updates and software longevity. Our aim is to highlight how interface choices and architectural shifts impact Samsung’s update policy and schedule.

    Samsung has made big promises about updates. They now guarantee up to 4 years of Android updates and up to five years of security updates for many Galaxy models. This is especially true for the Galaxy S and Note lines, which often get updates quickly.

    These promises are crucial for device security and planning the end of life for devices. They also affect the support businesses expect when buying devices for their employees.

    Historically, Samsung used many proprietary UI layers, making updates challenging. With the shift to One UI, Samsung could better match updates with Android releases. This change has improved the update schedule and made it clearer when devices will no longer receive updates.

    In this article, we’ll list phones that get the longest security updates under Samsung’s policy. We’ll use the UI evolution to explain why updates have gotten better. This will show what Android update support means for device security and longevity in the U.S.

    Key Takeaways

    • Samsung has moved from TouchWiz to One UI while improving update commitments.
    • Samsung update policy now includes clearer promises, such as 4 years Android updates on many models.
    • Interface simplification helped Samsung deliver more consistent Android update support.
    • Galaxy S and Note series typically receive prioritized updates under the Samsung update schedule.
    • Understanding Samsung end of life timelines is vital for consumers and IT managers planning device lifecycles.

    The Birth of TouchWiz: A Flashy Start

    When Samsung introduced TouchWiz in 2008–2010, it aimed to make its phones unique. The interface featured custom widgets, bold icons, and deep OEM features. These elements tied the hardware to a distinct brand identity.

    Let’s dive into the key points that made TouchWiz memorable and sometimes challenging for users and carriers.

    Introduction to TouchWiz

    TouchWiz was a full-skin approach, not just a theme. Samsung wanted to add value with proprietary apps and visual flair. Carriers could customize it, making it rich in exclusive features but tightly tied to the phone’s system.

    Key Features of TouchWiz

    • Custom home screens and a wide range of widgets for quick access to information.
    • Heavy theming and exaggerated visual effects that emphasized Samsung’s brand style.
    • Proprietary apps like S Memo and S Planner that extended functionality beyond Google apps.
    • Carrier-specific additions that often required extra integration and testing.
    • Deep system hooks, which made some features feel native but complicated updates.

    User Reception

    Users had mixed feelings. Some loved the added features and widgets for productivity and personalization. Others criticized bloat, inconsistent design, and performance issues on lower-end hardware.

    The heavy customization affected software maintenance. OEM modifications led to longer testing cycles. This delayed security and Android upgrades, impacting Samsung’s update policy and device longevity.

    Aspect Impact Relevance to Updates
    Deep system integration Rich features, higher complexity Increased testing time for patches
    Proprietary apps Added value, duplicated functions Compatibility checks with new Android versions
    Carrier customizations Fragmented user experience Staggered rollouts across networks
    Visual effects and theming Distinct look, potential sluggishness Performance tuning extended the Samsung update schedule
    User perception Mixed satisfaction Increased scrutiny of Samsung update policy and Samsung end of life planning

    TouchWiz: The Early Years

    The Galaxy S line launched in 2010 marked the start of Samsung’s interface journey. TouchWiz was a key part of these devices, influencing how Android looked and worked on Samsung phones. The Galaxy S and S II got new features first, while midrange phones followed later.

    Features were introduced in a model-specific way. This led to carrier and region variants with different release times and content. The unpredictable Samsung update schedule frustrated many buyers.

    The early TouchWiz skin caused performance and consistency issues. Its heavy visuals and background services slowed some devices. Users and critics noted that the experience varied greatly across models.

    Fragmentation became a major problem. Different firmware from carriers or regions delayed major OS upgrades and security patches. These delays made users worry about Samsung’s support for older devices.

    These challenges led to policy changes. Feedback on slow updates and maintenance pushed Samsung to change. They now focus on lighter, cleaner skins to speed up updates and improve security.

    Aspect Early TouchWiz Reality Impact on Users
    Rollout Pattern Flagships first; midrange later; carrier/region variants common Uneven access to new features; confusing timelines
    Performance Heavy UI elements increased system load Slower phones; battery and responsiveness concerns
    Update Cadence Longer intervals for OS upgrades and patches Uncertainty about 4 years Android updates and timely fixes
    Device Lifespan Perception Fragmented support and delayed fixes Early worries about Samsung end of life and resale value
    Company Response Move toward lighter skins and streamlined firmware Improved Samsung update schedule planning and faster patches

    TouchWiz 2.0: Refinements and Updates

    We look back at TouchWiz 2.0 as the moment Samsung began cleaning up its interface. The release aimed to modernize visuals, tighten performance, and make the software feel closer to the hardware it ran on.

    New features focused on polished icons and smarter widgets. We saw a simplified icon set that read better on AMOLED screens and refreshed widgets for weather, calendar, and music. Camera and media apps gained faster access and clearer controls. Tighter integration with Samsung hardware improved color tuning and battery handling on AMOLED panels, which made everyday use feel more refined.

    We organized the changes into practical gains for users:

    • Simpler visuals for cleaner navigation
    • Enhanced widgets for at-a-glance info
    • Camera and media tweaks for faster capture and playback
    • AMOLED optimizations that reduced color bleed and saved power

    Performance work targeted memory use and background task management. We noticed leaner system processes and fewer apps auto-launching, which reduced lag. Those optimizations meant Samsung could adapt new Android versions faster for flagship models by cutting the time spent reworking core components.

    Those engineering gains had a direct effect on update practices. As TouchWiz became slimmer, Samsung began formalizing a clearer Samsung update policy and a more predictable Samsung update schedule. We still saw a gap between Samsung’s pace and Google’s timeline, but the direction favored quicker security patches and feature backports.

    The changes shifted buyer expectations. Enterprise and security-minded customers started checking Samsung update schedule details before purchasing. Promises around 4 years Android updates were not yet the norm, but the groundwork in TouchWiz 2.0 helped Samsung move toward longer support windows for select models.

    The Transition to TouchWiz Essence

    Samsung moved towards a cleaner, lighter interface. The TouchWiz Essence effort cut down on extra visuals. It kept Samsung features like Multi Window and special gesture controls.

    We made the codebase simpler to match AOSP more closely. This made the system leaner and used fewer resources on devices with modest hardware. The design change reduced animation clutter and made icons simpler, making everything feel faster.

    We aimed to make UX improvements that users would see every day.

    Improved notification handling: notifications were clearer, grouped better, and responded quicker to taps and swipes.

    Simplified settings: menus had fewer unnecessary entries and put important controls within easy reach, cutting down on taps for common actions.

    Better battery management: background tasks were controlled more wisely, leading to longer standby times and fewer thermal spikes.

    These changes made devices feel more stable and quick to respond. They also made updates easier by simplifying integration.

    Because the code was closer to AOSP, Samsung could update faster. This change affected the Samsung update schedule and policy for all devices.

    The long-term effect was on device support. The simplification helped Samsung support devices longer. It also influenced how Samsung determined end of life dates for different products.

    The Shift Towards Samsung Experience

    Samsung changed its interface from TouchWiz to a cleaner one around 2016–2017. This move focused on making things easier to use. It also made sure phones and tablets looked the same.

    We divided the update into phases to help customers adjust. The goal was to make settings clearer and more stable, not just to look new.

    Release of Samsung Experience UI

    Samsung Experience replaced TouchWiz. It made icons simpler and navigation easier. Bixby, a new assistant, was introduced. Samsung Pay became a core part of the system.

    Key Innovations and Features

    • Improved multitasking with split-screen and edge panels for faster task switching.
    • System-wide theming to reduce fragmentation and create a uniform brand feel.
    • Refined quick panels and settings that cut clutter and speed up access to common controls.
    • Tighter security updates and clearer communication about the Samsung update policy.

    Modular architecture allowed Samsung to update features faster. This made it possible to talk about 4 years of Android updates for recent flagships.

    Customers started to expect longer support and a clear update schedule. Samsung’s messaging during this time set the stage for what to expect from device updates.

    Introducing One UI: A Game Changer

    When Samsung introduced One UI in 2018 and 2019, it marked a big change. The goal was to make phones easier to use with one hand. It also aimed for a cleaner, modern look.

    One UI

    One UI focused on a few key goals. First, it aimed to make finding important actions quick and easy. Second, it placed key tasks in the lower screen area for easy thumb access. Third, it ensured a consistent look across all Samsung devices.

    Goals and Philosophy Behind One UI

    Our main goal was to make things clear and easy to use with one hand. We moved large touch targets to the bottom of the screen. We also removed visual clutter to focus on what’s important.

    Design Simplifications

    We made buttons bigger, icons simpler, and added a dark mode to reduce eye strain. We also made sure layouts worked well on foldables and tablets. This way, Samsung-specific features could be updated separately from the core Android.

    This modular design made updating devices easier. It allowed Samsung to roll out updates faster. This change also helped Samsung support devices for longer periods.

    Today, Samsung promises 4 years of Android updates and extended security. This shows how One UI’s design made it possible to support devices for longer.

    Aspect Design Move Effect on Updates
    One-handed use Larger touch targets in lower screen area Consistent UI regions reduced fragmentation
    Visual clarity Simplified iconography and modular components Allowed selective component updates without full OS rollouts
    Device adaptability Adaptive layouts for foldables and tablets Easier backporting of fixes across form factors
    Security and longevity Modular system updates and clearer release channels Supported Samsung update policy shifts toward 4 years Android updates

    One UI and Its Major Releases

    We explore One UI’s journey from its start to the latest updates. Each new version brought more features, better Android integration, and stronger security. We look at the big changes and how Samsung improved its update schedule and policy to please users.

    Major updates and features

    One UI 1.0 made the interface simpler and more comfortable. Later, One UI 2 and 3 added better gestures and camera features. These updates made everyday use easier.

    One UI 4 put a focus on privacy. One UI 5 and 6 brought more multitasking and productivity tools. They also improved battery life and performance.

    One UI 7 aimed for better Android parity, tighter developer APIs, and more camera and productivity features. These updates help creators and business users.

    User feedback and adaptations

    User feedback improved gesture responses and reduced preinstalled apps. Feedback on update timing led Samsung to be clearer about its update policy and schedules.

    Samsung split its update schedule for flagships and midrange devices. This allowed for longer support for high-end models and a more realistic schedule for midrange ones.

    Clear notices about when devices would stop getting updates and security patches helped. This made it easier for businesses and consumers to plan for replacements or extended support.

    We keep an eye on how One UI updates match Samsung’s promises and the changing expectations for software updates in the mobile world.

    The Role of One UI in Samsung’s Strategy

    One UI is more than just a design for Android. It’s a key part of Samsung’s brand, connecting phones, tablets, and wearables. It also promises long-lasting software support, shaping what buyers expect and guiding business choices.

    Samsung update schedule

    Market Positioning and Brand Identity

    One UI focuses on clear design, smooth visuals, and consistent use across devices. This makes Samsung’s phones and tablets seem like part of a single, high-quality system.

    Our marketing emphasizes long-term support. We tell customers that Samsung devices stay secure and useful for years, thanks to our update policy and schedule.

    Competitive Landscape

    We compare Samsung’s strategy to Google and Apple’s. Google puts the OS first with Pixel devices, while Apple combines hardware and software tightly. This leads to long iOS updates.

    Samsung’s promise of 4 years of Android updates helps it compete. This commitment is especially important for U.S. buyers who value device longevity and security.

    Strong update promises and a unified UI help in business and carrier deals. They make managing devices easier, clarify when devices will stop getting updates, and support policies that focus on security and predictability.

    Future Prospects for Samsung’s UI

    We’re looking at how One UI might change to fit new device habits and user wants. We focus on real improvements that make daily life better on phones, tablets, foldables, and smart home devices.

    We think AI will make One UI more personal. It will adjust layouts, shortcuts, and notifications to fit our daily lives. This will make using foldables easier and reduce clutter for one-handed use.

    One UI will work better with Samsung Cloud, SmartThings, and wearables. This will let us easily move between devices. We might also see faster security and performance updates without needing a full OS update.

    User-Centric Design Approach

    Samsung plans to make One UI more user-friendly. It will focus on easy reach, clear design, and fewer unnecessary features. This will help us navigate big screens and do common tasks faster.

    There will be clearer plans for support and updates. This will help buyers choose the right devices. Knowing when updates will come will make planning easier. Samsung will also share more about its update policy and when devices will stop getting updates.

    Samsung might offer more support for devices over time. This could include four major Android updates and five years of security patches. This would make devices last longer and offer better support.

    Area Likely Change Benefit to Users
    Foldable UX Adaptive layouts and improved app continuity Smoother multitasking and fewer interruptions when switching modes
    AI Personalization Context-aware home screens and notification filtering Faster access to frequent tasks and reduced distractions
    Update Delivery Modular patches and clearer Samsung update schedule Faster security fixes and transparency about update timing
    Support Policies Expanded multi-year commitments and explicit Samsung end of life notices Better purchase decisions and longer device value
    Integration Tighter SmartThings and cloud sync Simpler cross-device workflows and unified settings

    Conclusion: The Journey Ahead

    We’ve seen Samsung’s interface change a lot. It started with TouchWiz, then moved to TouchWiz 2.0 and TouchWiz Essence. After that, it became Samsung Experience, and now it’s One UI.

    Each change made things cleaner and faster. This made it easier for Samsung to send out updates quickly. This is good for users who keep an eye on the Samsung update schedule.

    Looking to the future, One UI’s design is more flexible. This means Samsung can support updates better without big changes. The promise of 4 years of Android updates is a big plus for security and business users in the US.

    But, it’s important to check if your phone model is included. This can affect how long your phone will get updates.

    We’ll soon publish a list of Samsung phones and how long they get updates. Check Samsung’s official pages to see if your phone is on the list. Remember to think about the update schedule and policy when buying a new phone.

    FAQ

    What is the relationship between Samsung’s interface evolution (TouchWiz → One UI) and its update policy?

    Samsung’s interface changes led to its update policy. Early TouchWiz was very customized, making updates slow. Later, Samsung made the UI simpler, which helped speed up updates.

    One UI’s design made updates even faster. Now, Samsung promises up to four years of Android updates and five years of security patches for many devices. This makes devices last longer and makes it clear when they will stop getting updates.

    Which Samsung phones typically received priority for updates in the past, and has that changed?

    Before, Samsung’s top phones got updates first. But now, Samsung updates more phones faster. Flagships, foldables, and some mid-range phones get updates sooner.

    It’s best to check Samsung’s update schedule to see if your phone is included. This way, you know when to expect updates.

    How many years of Android and security updates does Samsung now promise?

    Samsung promises up to four years of Android updates and five years of security patches for many phones. But, it depends on the phone model and where you are.

    For exact details, check Samsung’s support pages or the phone’s specs. This will tell you if your phone is covered.

    How did TouchWiz’s design choices affect device performance and update speed?

    TouchWiz was very customized, which slowed down updates. It also made phones run slower on lower-end hardware. This meant phones didn’t last as long before needing updates.

    Also, updates were different in different places, making things even more complicated. This led to phones getting outdated faster.

    What technical changes in One UI help Samsung deliver longer update support?

    One UI is designed to make updates easier. It separates Samsung features from Android, which makes updates faster. It also uses less memory and battery, and works well on different devices.

    These changes help Samsung update phones more efficiently. Now, they can promise longer support for many devices.

    For enterprise buyers in the U.S., how should Samsung update promises influence device selection?

    Businesses should choose phones with long update promises. This means flagships, foldables, and high-end A-series phones. These phones get updates for longer, which is safer and more reliable.

    Check Samsung’s update schedule and carrier rules before buying. This ensures the phones will work well with your business needs.

    Does Samsung provide a public schedule for updates and end-of-life dates?

    Samsung does publish when they will update devices. But, the exact dates can change. It depends on the carrier and where you are.

    For the most up-to-date information, visit Samsung’s support pages. They will tell you when your phone will get updates and when it will stop getting them.

    How can consumers verify whether a specific Galaxy model is eligible for four years of Android updates or five years of security patches?

    Check the official product page for your device. Also, look at Samsung’s software support pages and the phone’s specs. This will show if your phone is eligible for long-term updates.

    If you’re still unsure, contact Samsung customer support or your carrier. They can confirm if your phone is eligible for updates.

    Have Samsung’s update policies matched competitors like Google and Apple?

    Samsung’s update promises are getting closer to Google and Apple. Google’s Pixel phones update quickly, and Apple’s iOS support is very long. Samsung’s One UI and long update promises make Galaxy phones more appealing for those who want their devices to last longer.

    However, update times can still vary. It depends on the model and carrier.

    What should we consider to avoid unexpected Samsung end of life issues?

    To avoid surprises, buy phones with clear update promises. Choose recent flagships or high-end A-series models. Avoid older phones with unclear support.

    Keep your firmware up to date. Sign up for update notifications from your carrier or Samsung. Also, check if the phone works with your business if you’re buying for a company.

    These steps help ensure your device stays supported for its expected lifespan.

    Will Samsung extend update support further in the future?

    Samsung might offer even longer update support in the future. As One UI and hardware improve, Samsung could update more devices for longer. This is especially true for foldables and flagship phones.

    Industry trends and regulations might also push Samsung to support devices for even longer. Keep an eye on Samsung’s announcements for any changes to their update policy.

  • Fix Samsung Bootloop: Causes and Proven Ways to Fix It

    Fix Samsung Bootloop: Causes and Proven Ways to Fix It

    This guide is for Samsung owners and techs in the U.S. to fix a phone that won’t start. We aim to provide clear steps to tackle Samsung bootloop issues. This includes phones stuck on the Samsung logo or showing signs of a soft brick.

    We cover everything from what causes bootloops to how to fix them. You’ll learn about basic fixes like soft resets, safe mode, and wiping the cache partition. We also dive into advanced methods like Odin, Smart Switch, and ADB commands. Each step emphasizes safety, backing up data, and knowing when to seek help.

    Key Takeaways

    • We explain what causes a Samsung bootloop and how to recognize it quickly.
    • We outline simple fixes first: soft reset, safe mode, and cache wipe.
    • We show advanced recovery paths including Smart Switch, Odin, and ADB.
    • We highlight data backup and safety steps before attempting repairs.
    • We advise when to seek professional help to avoid worse damage or data loss.

    What is a Samsung Bootloop?

    A bootloop happens when a Samsung device can’t start up. It keeps restarting or gets stuck on the Samsung logo. Searches like what is Samsung bootloop, phone stuck on Samsung logo, and soft brick Samsung all relate to this issue.

    Definition of Bootloop

    A bootloop occurs when the bootloader, kernel, or Android runtime can’t start. It’s usually caused by software problems. This includes damaged app data, bad updates, or mods that don’t work.

    Deeper issues like firmware damage or a corrupt boot image are harder to fix. They often need professional tools.

    How Bootloop Affects Your Device

    The boot process has several stages. The bootloader starts, then the kernel, followed by the Android runtime. Finally, system services begin. If any stage fails, the device restarts or gets stuck on the logo.

    When a device boots into a loop, users can’t access their apps, contacts, or messages. The constant restarting can damage files and drain the battery. Trying to fix it without a backup can lead to losing all your data. So, we advise caution before taking any major steps.

    Common Causes of Samsung Bootloop

    Bootloop problems come from different sources. Knowing the cause helps us find the right solution. We’ll look at the main reasons for a phone stuck on Samsung logo or soft brick Samsung.

    Software glitches can start small but grow. Issues like app conflicts, corrupted caches, and rogue processes can stop the phone from starting up. A bad system app or cache error can make the phone restart over and over or get stuck on Samsung logo.

    Software Glitches

    We first check for app conflicts and cache corruption. Apps with too much power can mess with core files and cause kernel panics. Processes that shouldn’t be there can block boot services. Sometimes, cleaning caches or removing bad apps fixes the problem.

    Faulty Updates

    Broken OTA updates or wrong firmware can cause bootloop right after install. If an update doesn’t finish or the wrong ROM is flashed, the device might become soft brick Samsung. This often happens when users press “Install” and the phone keeps restarting.

    Corrupted update packages can leave system files incomplete. If the bootloader can’t find the right system files, the phone won’t move past the logo. Usually, reapplying the right firmware or flashing properly fixes it.

    Hardware Issues

    Physical problems can look like software issues. Bad eMMC or damaged storage can stop the OS from loading. A broken motherboard, faulty power IC, or loose connectors after a drop or spill can also cause frequent restarts and a phone stuck on Samsung logo.

    We look for signs of hardware problems: a bootloop after a fall, corrosion from moisture, or power issues. These signs tell us to look at hardware repairs or replacements instead of software fixes.

    To figure out the cause: a bootloop right after tapping install is often from firmware or a bad update Samsung. A loop after installing a new app or giving root access is from software glitches. A loop after physical damage means hardware failure.

    Signs Your Samsung is in a Bootloop

    When a Samsung device won’t start up right, we look for clear signs. These signs help us tell if it’s just an app crash or a bigger problem. It’s important to notice patterns and write down what happens before trying to fix it.

    Inability to Startup

    If the phone shows the Samsung logo but doesn’t get past it, we have a serious problem. It might try to load Android but get stuck on the logo for a long time. If the screen stays on the logo, it means there’s a problem with the system files or partitions.

    Continuous Restarting

    The phone keeps turning on, showing the logo, and then restarting. This cycle can happen fast or take a few minutes. If Samsung keeps restarting without you doing anything, it means the system can’t finish booting and keeps trying.

    Error Messages Displayed

    Error messages pop up in Recovery or Download Mode. You might see “Unfortunately, System UI has stopped” or “recovery is not seandroid enforcing.” These messages tell us about missing or damaged partitions. We pay attention to these messages because they help us know what to do next.

    It’s a good idea to do quick checks to see if it’s a bootloop. Try Safe Mode or Recovery to see if it can load basic services. Also, watch for LED lights or vibrations during the cycle. These can hint at hardware issues rather than software problems.

    How to Prepare for Bootloop Fixes

    Before we start, we take a few steps to make things safer and faster. We make a plan to handle Samsung devices that won’t start right. Our goal is to keep your data safe, make sure the phone has power, and have the right tools ready.

    prepare to fix Samsung bootloop

    Backup Your Data

    Backing up your data is our top priority before doing a factory reset. We use Google Account sync, Samsung Cloud, or Smart Switch if the phone is working. If it’s stuck in recovery mode, we try ADB pull or other recovery-mode options to save your files.

    If you can’t back up normally because of a bootloop, take out the microSD card if it has one. We also write down your IMEI and account details so we can handle Factory Reset Protection later.

    Fully Charge Your Phone

    It’s best to charge your phone to 60–80% before we start. For big tasks like Odin flashes or factory resets, keeping it plugged in helps avoid interruptions that could damage the phone.

    Gather Necessary Tools

    We get all the tools we need for Odin fixes and troubleshooting ready before we start. You’ll need a good USB cable, a Windows PC, Samsung Smart Switch, Odin software, Samsung USB drivers, and ADB/Fastboot tools. Having a stable internet connection is also important for downloads and account checks.

    For any hardware work, we add a SIM ejector, a small Phillips screwdriver, and basic ESD precautions. We also keep your Google and Samsung account logins handy and check your warranty status. This helps us decide the best repair option and how to handle data loss risks.

    Preparation Step Why It Matters Suggested Tools
    Data backup Prevents permanent loss when a reset or flash is required Google Account, Samsung Cloud, Smart Switch, ADB pull, microSD removal
    Charge device Stops mid-process shutdowns that can corrupt firmware Wall charger, cable, power bank for longer sessions
    Collect tools Speeds up recovery and avoids delays during critical steps USB cable, Windows PC, Odin, Samsung USB drivers, ADB/Fastboot, internet
    Document credentials Helps bypass FRP and reclaim the device after resets Record IMEI, Google and Samsung account logins
    Hardware readiness Allows safe inspection and minor repairs without static damage SIM ejector, Phillips screwdriver, anti-static wrist strap

    Basic Solutions to Fix Samsung Bootloop

    When your phone gets stuck on the Samsung logo, start with simple steps. We’ll show you quick fixes that might solve the problem without losing your data. Try each step one by one and see if your phone boots up normally before moving on.

    Soft reset

    Press the Power and Volume Down buttons together for 10–20 seconds to force a reboot. This soft reset Samsung method can fix many issues caused by a software glitch. Use it first if your screen is unresponsive or your phone keeps restarting.

    Remove the battery

    If your phone has a removable battery, turn it off, remove the battery, wait 30 seconds, then put it back in and start again. This step drains power and can fix problems a reset can’t. For phones without removable batteries, press Power + Volume Down to simulate battery removal. Be careful not to force parts on sealed devices.

    Boot into safe mode

    To enter safe mode, press and hold the Power button until the power menu shows. Long-press Power Off until you see Safe Mode, then tap to restart. On older models, use the volume-down combo during boot to enter safe mode. This option disables third-party apps to see if one is causing the bootloop.

    Start with a soft reset, then try booting into safe mode. Uninstall any recent or suspicious apps and test again. If your phone still gets stuck on the Samsung logo, we’ll move on to more advanced recovery methods.

    Advanced Solutions for Samsung Bootloop

    When simple steps don’t work, we try more advanced methods. These methods aim to fix system problems without guessing. We’ll explain each option, what it does, and any important warnings.

    Wipe Cache Partition

    To get into Recovery Mode, press the right buttons for your phone. For newer Galaxy phones, it’s Volume Up + Power + Bixby or Volume Up + Power. In Recovery, choose “Wipe cache partition.” This clears temporary files without losing your personal data.

    Clearing the cache often solves problems after updates or when caches get messed up. It takes a few minutes. If it works, your phone should start up normally after a reboot. If not, try the next step.

    Factory Reset Your Device

    If wiping the cache doesn’t help, a full reset from Recovery Mode is next. Pick “Wipe data/factory reset” to reset to factory settings and clear all user data.

    Be careful, as a factory reset erases apps, photos, and settings. After resetting, you might need your original Google or Samsung account to set up the phone. Always back up your data first and try simpler fixes.

    The reset takes 10–20 minutes. If your phone still won’t boot, it might be a hardware issue or a damaged system image.

    Use Samsung’s Smart Switch

    Samsung Smart Switch on your computer offers a fix called Emergency Software Repair. Connect your phone to the PC with a USB cable, open Smart Switch, and follow the Emergency Software Repair or Device Initialization steps.

    This tool reinstalls official firmware without using Odin. It can fix a soft brick Samsung caused by system file corruption. You need a stable internet connection and a device with an unmodified, locked bootloader. Custom ROMs or unlocked bootloaders might block Smart Switch repair.

    Reinstalling takes 20–40 minutes. If Smart Switch says it’s not compatible, don’t force other firmware tools. Instead, consider getting professional help.

    Method What It Does Timeframe Best For Key Caution
    Wipe cache partition Removes temporary system files, keeps user data 5–10 minutes Post-update glitches and corrupted caches May not help if system files are damaged
    Factory reset (Wipe data) Restores factory settings, erases all user data 10–20 minutes Severe software corruption after backups are made FRP requires original Google/Samsung account
    Samsung Smart Switch fix Reinstalls official firmware via desktop app 20–40 minutes Soft brick Samsung and failed OTA updates Not compatible with custom ROMs or unlocked bootloaders

    Using ADB Commands for Bootloop Issues

    ADB can help when a Samsung phone gets stuck in a bootloop. It’s best when the device can enter recovery mode or has USB debugging on. If the phone won’t respond, we might need to use Odin or Smart Switch to fix it.

    Setting Up ADB on Your Computer

    First, we install Android SDK Platform-Tools on Windows, macOS, or Linux. Then, we install Samsung USB drivers on Windows. macOS and Linux users use terminal permissions instead.

    On Windows, check Device Manager if drivers don’t work. Enable USB debugging on the phone by going to Settings > About phone and tapping Build number. Then, turn on USB debugging in Developer options.

    After connecting the phone with a good USB cable, run adb devices to check if it’s recognized.

    Executing ADB Commands

    To boot to recovery, use adb reboot recovery. To back up files, use adb pull /sdcard/DCIM/ to copy photos and documents to your computer.

    If you have an update package, apply it with adb sideload update.zip from recovery. Fastboot commands might work for some unlocked devices, but many Samsung phones use Odin instead. If the device won’t connect during a bootloop, ADB options are limited until recovery or debugging is possible.

    Tips for ADB Success

    Use original USB cables and USB 2.0 ports to avoid connection issues. Update drivers regularly. Installing Samsung Kies or Smart Switch can add compatible drivers on Windows.

    If recognition fails, try different computers. Keep a log of every command before taking risky actions that could erase data. If ADB can’t reach the device, consider using fix bootloop Odin procedures or Smart Switch for firmware restores.

    Utilizing Recovery Mode

    When your Galaxy device stops working, recovery options can help fix it. These tools let us clear caches, update the system, or reset the phone without starting Android. We’ll show you how to access these tools, safely restore your system, and when to use custom recoveries like TWRP or Odin.

    recovery mode Samsung

    How to access recovery on your phone

    Many Samsung phones use buttons to enter recovery mode. For newer Galaxy devices with Bixby, press Volume Up + Bixby + Power when off. Older phones with a Home key use Volume Up + Home + Power. If buttons don’t work, you can use adb with adb reboot recovery or Smart Switch on a computer.

    Always check Samsung support for the exact steps for your model. Different models and firmware versions require different methods. Using the right method helps avoid accidental bootloader changes.

    How to perform a system restore safely

    Recovery menus offer options like rebooting, wiping the cache, factory reset, and applying updates. To restore your system safely, start by wiping the cache partition. This keeps your data safe while clearing temporary files.

    For deeper fixes, a factory reset will erase your data but often solves software problems. You can apply official updates via ADB sideload or use Smart Switch to reinstall firmware on many Samsung phones.

    For firmware flashes needing a PC, Odin is used for Samsung firmware. Always use official packages and follow specific instructions for your model to avoid bricking your device.

    When to consider custom recovery solutions

    Custom recoveries are for advanced users who run custom ROMs or need full backups. Installing TWRP offers nandroid backups, flexible restores, and alternate install methods. We might choose custom recovery Odin when stock recovery can’t apply necessary images or for more control over partitions.

    But, custom recoveries come with risks. They may void your warranty, trigger FRP, and increase the chance of a permanent brick if not done right. Only experienced users should attempt custom recovery Odin or TWRP installs, and always check compatibility and bootloader status first.

    Action When to Use Pros Cons
    Wipe Cache Partition Slow boot, app crashes Safe, preserves data, quick May not fix deep firmware issues
    Factory Reset Persistent software corruption Resolves many system errors Erases user data; backup needed
    Apply Update from ADB/SD Install official OTA or ZIP Uses signed packages; official Requires technical steps and files
    Smart Switch / Odin Flash Firmware reinstall or downgrade Powerful recovery for firmware issues Risk of model mismatch; PC needed
    Custom Recovery (TWRP / custom recovery Odin) Rooting, custom ROMs, full backups Advanced features: nandroid, mounts Voids warranty, FRP/bootloader risks

    Seeking Professional Help

    If simple fixes don’t work or if your device has physical damage, it’s time to get professional help. A skilled technician can find hardware problems, get back your important data, and prevent making things worse. Make sure to bring your purchase proof and IMEI number to make the visit quicker.

    When to Visit a Service Center

    Go to an authorized center if you’ve tried safe mode, cache wipe, or ADB restores without success. If your phone was dropped, got wet, or won’t charge or cool down, it’s a hardware issue.

    When you can’t back up your files and your device is locked, a data recovery expert is crucial. For serious mainboard problems, a Samsung-certified tech has the right tools and parts.

    Typical Repair Costs

    Repair prices change based on the model and where you are. Basic checks or software updates might cost $50–$150 in the US. Fixing the mainboard can cost $150 to $400 or more for newer phones.

    Adding screen or battery repairs will increase the total cost. Using genuine Samsung parts will also raise the price. Always ask for a written estimate to compare prices before agreeing to the work.

    Warranty Considerations

    The Samsung warranty covers defects but not damage from water, drops, or unauthorized fixes. Rooting or unlocking your phone can void the warranty for software and hardware problems, including a soft brick.

    Check your warranty through the Samsung Members app or your original receipt. Carrier insurance and third-party warranties might cover some repair costs. Contact Samsung Support or an authorized service center for repair timelines and warranty coverage.

    Preventing Future Bootloop Problems

    We can lower the chance of a bootloop by following a few simple habits. Taking care of our devices before and after updates is key. Here are some easy steps for regular maintenance, safe app use, and keeping hardware in good shape.

    It’s best to install official OTA updates right away. Make sure the battery is over 50% and Wi-Fi is strong before updating. These steps help avoid Samsung bootloop issues caused by interrupted or damaged installs.

    Avoiding incompatible apps

    Stick to downloading apps from Google Play or the Samsung Galaxy Store. Always check app permissions and read user feedback. Stay away from unknown APKs and tools that require root access unless you know what you’re doing. Remove any app that crashes or drains your battery too fast to prevent soft brick Samsung problems.

    Importance of device maintenance

    Keep your phone in a protective case and avoid drops and moisture. Clean your ports carefully. Make sure you have enough storage and clear cache regularly to keep your phone running smoothly. Back up your data with Smart Switch or cloud services to avoid losing important files if you need to fix a stuck phone.

    Everyday habits can help a lot. Always have at least 10–20% free storage, limit experimental firmware flashes, and avoid fast chargers that can overheat your battery. These steps help prevent soft brick Samsung issues and keep your device healthy for a long time.

    Practice How to Do It Benefit
    Install official updates Use OTA, ensure battery >50%, stable Wi‑Fi Reduces corrupted installs that cause bootloops
    Use trusted app stores Download from Google Play or Samsung Galaxy Store Limits incompatible apps and security risks
    Regular backups Smart Switch or cloud backups weekly Minimizes data loss if recovery is required
    Physical protection Case, screen protector, avoid moisture Prevents hardware faults that lead to boot issues
    Storage and cache care Keep 10–20% free space, clear cache periodically Improves stability and reduces startup errors
    Avoid risky modifications No experimental firmware or unknown root tools Prevents soft bricks and supports phone stuck on Samsung logo prevention

    Conclusion: Your Path to Fixing the Bootloop

    We’ve outlined a clear path to fix a phone stuck on Samsung logo or a soft brick Samsung. First, we diagnose the problem. Then, we try simple fixes like a soft reset and safe mode. If these don’t work, we move to more advanced steps like wiping cache, factory reset, and using tools like Odin or ADB.

    Remember, follow the steps in order and back up your data whenever you can. Always choose safe methods to fix Samsung bootloop issues. Using tools like Odin can help, but misuse can make things worse or void your warranty. If you think it’s a hardware problem, go to an authorized service center.

    Act fast to save your data and prevent more damage. Many bootloop problems can be fixed with careful troubleshooting. But, delays can lead to permanent loss. If you’re not sure what to do, contact Samsung support or visit an authorized repair center.

    For specific help, check Samsung’s official support pages, the Samsung Members app, or trusted communities like XDA Developers. Always try safe, official methods first. This way, you avoid making a bad problem worse.

    FAQ

    What is a Samsung bootloop and how does it differ from a soft brick?

    A Samsung bootloop happens when a device can’t start up and keeps restarting. A soft brick is a software problem that can be fixed with tools like a soft reset. But, a hardware problem or bad firmware might need a pro to fix.

    My phone is stuck on the Samsung logo. What quick steps should we try first?

    First, try a soft reset by holding Power + Volume Down for 10–20 seconds. Then, try Safe Mode to disable apps. If it works, remove and put back the battery. These steps might fix the problem before you need more advanced tools.

    How do we back up data if the phone won’t boot normally?

    If your phone can get to Recovery Mode or ADB, use adb pull to save files. Smart Switch’s backup can also help. For devices that almost work, try Recovery Mode and ADB sideload or Smart Switch repair. If all else fails, you might need a pro to get your data back.

    When should we wipe the cache partition, and what does it do?

    Wiping the cache partition removes temporary files without losing your data. Try this early if a bootloop happens after an update or app install. Use the device’s button combo to get to Recovery Mode and choose “Wipe cache partition.” It often fixes problems caused by bad caches after updates.

    Will a factory reset fix a bootloop, and what are the downsides?

    A factory reset can fix firmware problems by going back to default settings. But, it erases all your files and might trigger Factory Reset Protection (FRP). You’ll need your original Google or Samsung account to use the device again. Back up your data first and try simpler fixes before resetting.

    What is Odin, and when should we use it to fix a Samsung bootloop?

    Odin is a tool for Windows to reinstall official firmware. Use Odin when other fixes fail or you need to manually flash stock firmware. It can fix soft-bricked devices but requires caution—use the right firmware, Samsung drivers, and follow steps carefully.

    Can Samsung Smart Switch repair my phone without using Odin?

    Yes, Smart Switch desktop has an “Emergency Software Repair” feature. It can reinstall firmware and fix many boot issues without Odin. It’s safer for most users but might not work on devices with custom ROMs or severe hardware problems.

    How do we use ADB to help with bootloop problems?

    If your device is in Recovery or has USB debugging on, set up ADB on your computer. Use adb devices to confirm the device. Useful commands include adb reboot recovery, adb pull for backups, and adb sideload for updates. ADB needs drivers and a working connection; otherwise, use recovery or Smart Switch.

    What are the signs that the bootloop is caused by hardware rather than software?

    Hardware issues might include a bootloop after a drop or water damage, odd power behavior, or failure to enter Download/Recovery modes. Unusual heat or visible damage also points to hardware problems. Repeated software fixes after official firmware flashing suggest hardware faults like a failing eMMC or damaged motherboard.

    When should we take the phone to a service center, and how much will it cost?

    Take your phone to a service center after trying software fixes or if you suspect damage. Diagnostic or software reflash fees in the U.S. are usually –0. Mainboard repairs or replacements can cost 0–0+ depending on the model and part availability. Check warranty, Samsung support, and authorized centers for estimates.

    Will fixing a bootloop void our warranty?

    Official repairs by Samsung or authorized centers usually keep your warranty valid. But, unlocking the bootloader, installing custom recoveries, or third-party repairs can void it. Always check your warranty status and use authorized support when possible.

    How can we prevent bootloop problems in the future?

    To avoid bootloops, install official OTA updates quickly and keep battery and Wi-Fi stable during updates. Avoid unknown APKs and risky tools, keep enough free storage, and back up regularly. Physical care like cases and screen protectors also helps prevent hardware-related bootloops.

    Our device is rooted or running a custom ROM—does that affect repair options?

    Rooted devices and custom ROMs can make recovery harder. Official tools like Smart Switch might fail, and FRP can trigger after resets. Odin flashes might need extra steps. Custom recoveries (TWRP) offer advanced restores but pose risks. Experienced users should proceed with caution and document current firmware and backups before making changes.

    Are there model-specific steps we should follow to access Recovery or Download Mode?

    Yes, button combinations vary by model. For example, Volume Up + Bixby + Power on some Galaxy devices, or Volume Up + Power + Home on older models. If button combos don’t work, use adb reboot recovery or check Samsung’s model-specific support pages. Always verify the exact sequence for your model before trying advanced steps.

    What safety tips should we follow during advanced fixes like Odin or firmware flashing?

    Make sure your phone has at least 60–80% battery or is plugged in. Use a reliable USB cable and USB 2.0 port, install official Samsung USB drivers, and download matching firmware for your model and CSC. Document account credentials for FRP. Avoid interrupting the flashing process; if unsure, stop and seek professional help to prevent damage.

    If our attempts fail, can data be recovered from a bricked Samsung phone?

    Data recovery is possible, especially if the storage is intact and the device can be accessed in certain modes. Professional data recovery services can extract files from chips or working partitions. Success depends on the damage type and prior attempts. Stop further flashing or repair attempts and consult a reputable data recovery specialist when data is critical.

  • How to Fix Lost Signal (IMEI Null) After Changing Samsung Firmware

    How to Fix Lost Signal (IMEI Null) After Changing Samsung Firmware

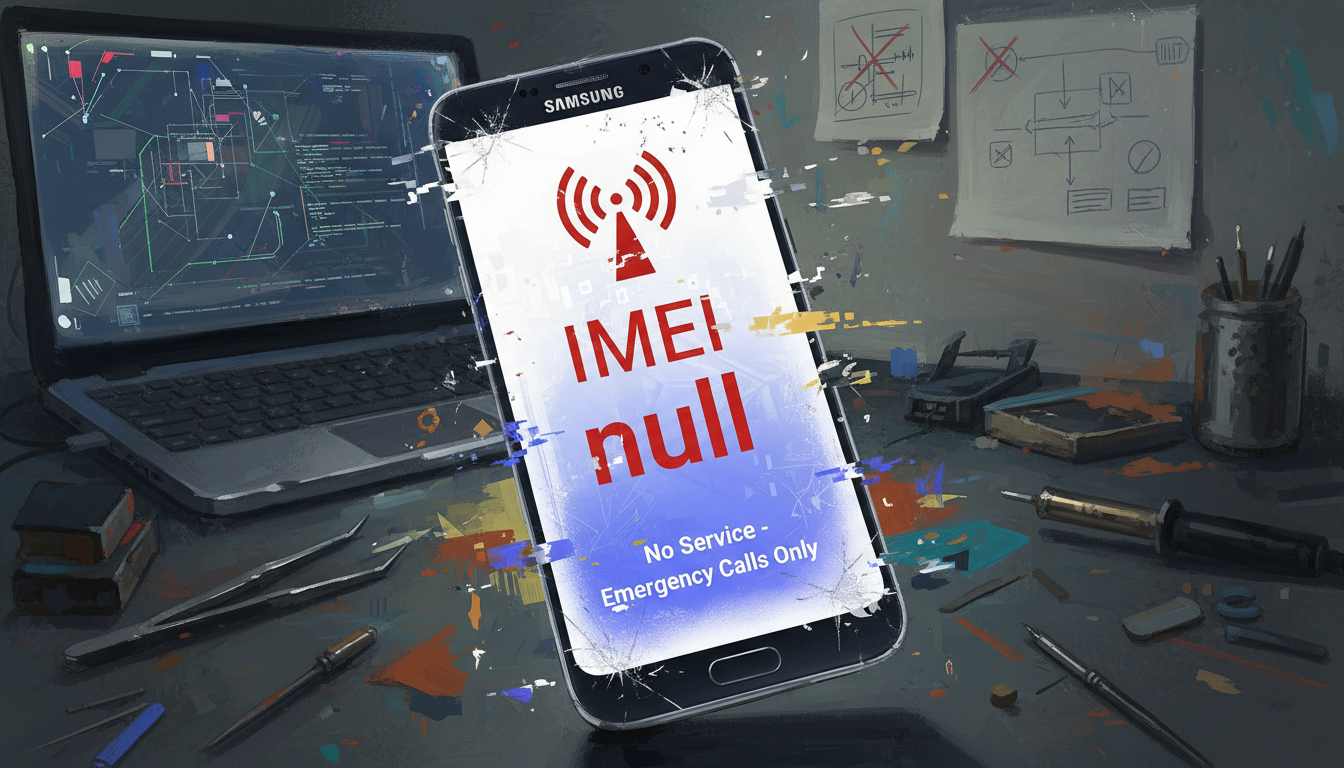
    This guide is for U.S. users who lost mobile network after changing Samsung firmware. You might see “IMEI: null,” “unknown,” or “baseband unknown” messages. These issues often happen after unofficial ROM installs or region mismatches.

    We’ll take a step-by-step approach to solve these problems. We’ll cover the causes, basic troubleshooting, and how to restore IMEI on Samsung devices. We’ll also talk about using official Samsung tools and when to get professional help.

    This guide is for tech-savvy users who flashed firmware or want to fix their device. Before starting, make sure to back up your data. Remember, changing IMEI is illegal in many places. Our goal is to help you restore your device’s original settings legally.

    Key Takeaways

    • Samsung IMEI null often follows firmware flashes or CSC mismatches.
    • Symptoms include “IMEI: null,” “baseband unknown,” and “network not registered.”
    • We cover troubleshooting, re-registering IMEI, and official tools like Smart Switch and Odin.
    • Always back up your data and follow legal restoration methods.
    • Intended for users comfortable following technical instructions.

    Understanding IMEI Null Issues and Their Causes

    First, let’s define the problem. IMEI stands for International Mobile Equipment Identity. It’s a unique number used by carriers to verify a phone. If a phone shows IMEI null, IMEI: 0, or an unknown IMEI state, it means the device’s EFS partition or NVRAM is damaged. This area holds radio settings and identity data.

    This is different from being blacklisted by a carrier. IMEI null is a local issue that stops the phone from showing a valid ID to the network.

    Now, let’s look at common reasons for this problem after flashing. Flashing the wrong firmware can mess up EFS mappings. If the Odin flash is interrupted or the wrong PIT file is used, NVRAM might not be complete.

    Also, if the EFS/NVRAM backup is corrupted or missing, IMEI records can be lost. Custom ROMs that don’t handle modem or EFS properly can also delete important data. Errors during flashing or hardware problems like failing storage can cause similar issues.

    Let’s talk about how this affects daily use. A phone with IMEI null can’t connect to mobile networks. This means calls and mobile data won’t work. SMS might not send, and the phone might say “network not registered.”

    The About phone screen might show “baseband unknown cause.” This means the radio firmware is not recognized or is not compatible. Services like Wi-Fi calling and VoLTE might stop working. But, the phone can still use Wi-Fi.

    Carriers block service because the phone can’t show a valid IMEI.

    We have a quick guide to help you figure out what’s wrong with your device.

    Issue Typical Cause Observable Symptom
    Corrupt EFS/NVRAM Failed or incomplete firmware flash; bad backup restore IMEI null, IMEI: 0, inability to register to network
    Incompatible firmware Region-mismatched ROM or missing modem files Baseband shows unknown, mobile data and calls fail
    Interrupted flashing Power loss or USB interruption during Odin/flash Partial write, unstable radio, network not registered
    Custom ROM without modem support ROM excludes proper modem binaries or EFS handling IMEI lost, VoLTE/Wi-Fi calling disabled
    Hardware storage failure Failing eMMC or UFS chip Repeated corruption, persistent IMEI null across flashes

    Signs You Have an IMEI Null Error

    After updating our Samsung device, we might notice signs of damage. This includes issues with the radio layer or EFS/NVRAM. Knowing these signs helps us act fast to fix IMEI problems.

    No Signal or Poor Connectivity

    After updating, we might see no bars or an “Emergency calls only” message. This could mean our phone’s radio or baseband firmware is damaged. It might also cause data, SMS, and calls to fail at random.

    Seeing “network not registered” is another warning sign. It means our modem isn’t talking to the carrier. Even with a good SIM and coverage, a no signal issue could point to firmware damage.

    Device Identification Problems

    In Settings > About phone, we check the IMEI. If it’s null, unknown, or empty, it’s a big problem. Dialing *#06# should also show our IMEI. If it doesn’t, it’s a clear sign of trouble.

    Looking at the Baseband version is also important. If it’s unknown or missing, it’s a sign of EFS/NVRAM corruption. These signs often mean we need to fix our Samsung IMEI.

    Unexpected Restarts or Crashes

    Corrupted radio firmware or a mismatched modem can cause problems. Our devices might restart often, freeze, or crash apps. This is because the system is unstable.

    These issues don’t always mean an IMEI problem. But they often happen when trying to fix baseband issues. We treat these symptoms as part of a bigger troubleshooting plan.

    Symptom What to Check Likely Cause
    No bars / Emergency calls only SIM seating, carrier coverage, dialer status Corrupted baseband firmware leading to network not registered
    IMEI shows null or unknown Settings > About phone, dial *#06# EFS/NVRAM corruption causing Samsung IMEI null
    Baseband listed as unknown Check Baseband version in About phone Missing or damaged modem firmware; need to fix baseband unknown
    Frequent reboots or app crashes Observe logs, safe mode, recent flashes Mismatched modem or corrupted radio causing instability and no signal Samsung

    Basic Troubleshooting Steps to Start With

    We start with simple checks to solve many connection issues. These steps help find and fix basic problems before trying more complex repairs. Make sure to test your phone after each step.

    Restart Your Device

    Try a full power-off restart instead of a soft reset. Press the power button, choose Power Off, wait 30 seconds, then turn it back on. This can reset the modem and sometimes fix the signal.

    Boot into Safe Mode to see if apps are causing problems. Safe Mode turns off third-party apps. This helps find if an app is causing issues.

    Check SIM Card Functionality

    Take out and put back the SIM card to check for dirt or misalignment. This can cause “network not registered” errors.

    Test the SIM in another phone to see if it works. Also, try a known-working SIM in your Samsung device. This helps figure out if the problem is the SIM or the phone.

    Look at the SIM tray contacts and check eSIM settings in the Samsung settings app. These steps help before moving to software fixes.

    Verify Network Settings

    Make sure Airplane Mode is off and check the network type (LTE/3G/2G). The wrong setting can block carrier registration.

    Review APN settings and carrier profile updates. Wrong APN or outdated carrier files can cause connection problems.

    Try changing Network operators from automatic to manual and back to automatic. If you still see errors, the problem might be deeper. Then, follow steps to fix baseband unknown or seek expert help for IMEI repair.

    How to Re-Register Your IMEI

    When a Samsung device shows Samsung IMEI null after a firmware change, we need a clear, step-by-step approach. The process starts with basic checks, moves through what we can do with the phone dialer, and finishes with verification steps. These steps help confirm a successful restore IMEI Samsung attempt.

    Samsung IMEI null

    Accessing the Dialer

    Some Samsung models let us open diagnostic and service menus from the phone app. Entering *#06# displays the current IMEI and helps confirm whether the device reports Samsung IMEI null. Service-mode dialer codes vary by model and region, so we should document visible values before making changes.

    We should keep a copy of the original IMEI found on the retail box, under the battery, or in our carrier account. That copy serves as the reference if we need to restore IMEI Samsung from backup or confirm a repair.

    Entering the Correct Codes

    Standard consumer dialer codes rarely allow a full IMEI rewrite. In some cases, authorized service-level menus or Samsung service tools can rewrite IMEI from a valid EFS backup. We must respect legal limits: rewriting IMEI to conceal a device is illegal in many jurisdictions. We only discuss restoring a legitimate original IMEI lost to software corruption.

    If we have an EFS backup, specialized restoration tools or service center software can re-register IMEI Samsung. Without that backup, re-registration typically requires professional tools and authenticated service access rather than basic dialer codes IMEI entries.

    Verifying IMEI After Re-Registration

    After any restore IMEI Samsung attempt, we should verify results in Settings > About phone and by dialing *#06# again. Confirming the IMEI and checking that the baseband version is populated helps ensure network functions return.

    If IMEI still reads null, we recommend pursuing an EFS restore or contacting a Samsung authorized service center for professional repair. Keep a copy of the original IMEI handy to confirm that re-register IMEI Samsung efforts restored the correct value.

    Using Samsung’s Official Tools for IMEI Restoration

    We explain how to fix a lost IMEI after changing firmware. These tools solve software problems that might make your IMEI null or cause baseband errors. Make sure to follow each step carefully and use the right files for your model to avoid damage.

    Samsung Smart Switch IMEI

    Samsung Smart Switch is for backing up and fixing software issues on supported devices. It can reinstall official firmware or run recovery processes. These can fix system partitions and might bring back normal baseband behavior.

    To use Smart Switch, you need a compatible PC, a USB cable, and the latest version. Connect your device, select emergency software recovery or reinstall, and follow the prompts. This method might fix your IMEI without needing advanced flashing.

    Odin fix baseband unknown

    Odin is Samsung’s tool for flashing official AP, BL, CP, and CSC files. It’s used by service centers and advanced users. Flashing the right CP (modem) and EFS-backed files can fix baseband unknown and IMEI null issues when software partitions are damaged.

    • Get model-specific firmware from trusted sources like SamMobile or Samsung’s official servers.
    • Back up EFS and user data if you can before starting.
    • Enter Download Mode, load the right PIT/CP/AP files in Odin, then flash carefully.
    • Check the baseband and IMEI after rebooting.

    Be careful with Odin as it can brick your device. Only flash files that match your exact SM-XXXX model and region. If your bootloader is unlocked or the device was rooted, warranty and behavior may change.

    Tips for Using Official Tools Safely

    Always use official, model-specific firmware and check the device model and region. Back up everything with Smart Switch or ADB before flashing. Make sure the battery is over 50% and use the original USB cable for a stable connection.

    Follow detailed guides from trusted repair communities or Samsung support. Keep your device’s serial and IMEI records handy. Flashing official firmware usually keeps your warranty, but unlocking or rooting before can affect it.

    Seeking Professional Help for Complex Issues

    When simple fixes don’t work, it’s time to call in the experts. Trained technicians can find and fix deep problems that home tools can’t handle. Issues like a Samsung IMEI null condition often require professional help.

    Start by contacting Samsung support to check if your device is still under warranty. They can guide you on what to do next. If the problem is from an official update or a manufacturing defect, repairs might be free. But, if a third-party firmware caused the issue, you might have to pay for a diagnosis first.

    When to Visit a Service Center

    Take your device to a service center if simple fixes can’t fix the IMEI issue. This is also true if the modem or radio fails tests or if you need to verify serials and IMEI. Authorized technicians can safely fix these problems and work with carriers if needed.

    What to Expect from Professional Repair

    Service centers do detailed checks and may reflash official software. They can also restore the EFS partition from backups. Technicians test the radio and modem and might use special tools to fix the IMEI.

    Cost Implications of Professional Services

    If your device is still under warranty and Samsung accepts the fault, repairs are free. If it’s out of warranty, you might have to pay a diagnostic fee first. Simple fixes are usually cheap, but more serious repairs can cost a lot.

    Issue Type Typical Service Action Expected Cost Range
    Software corruption (EFS/IMEI missing) Official reflash, EFS restore from backup, carrier coordination Free under warranty; $25–$150 out of warranty
    Locked bootloader or warranty locks Manufacturer-level unlocking, verification, official tools Free if covered; $50–$200 otherwise
    Hardware fault (UFS/eMMC or radio module) Board-level repair or component replacement, radio testing $150–$600 depending on parts and labor
    Third-party firmware damage Diagnostic, official reinstallation, possible hardware checks $50–$300 based on complexity

    For urgent issues, like SIM and registration errors, professional help is often the fastest solution. If your device keeps showing no-network states after trying fixes, a service center visit can help. Visiting a Samsung service center is the safest way to get a permanent fix.

    Preventative Measures to Avoid IMEI Null in Future

    We aim to keep our Samsung devices safe from signal loss and data damage. Simple habits before and during updates can help prevent IMEI null. These steps focus on safe software, firmware, and backup practices.

    Regular software updates

    We update our Samsung devices with official OTA updates as soon as they’re available. We test updates for modem and system compatibility. This keeps our devices secure and reduces the risk of modem problems.

    Proper firmware management

    We avoid unofficial firmware and ROMs unless we’re experienced with flashing. When flashing, we ensure the firmware matches our device’s model and carrier. We also consider the bootloader state to avoid partition damage and baseband errors.

    Backing up device information

    We always backup EFS/NVRAM before firmware changes. Smart Switch safely backs up user data for most users. Advanced users use specialized tools for a root-level backup. We keep the original IMEI record safe to re-register if needed.

    Here’s a quick guide for firmware changes.

    Action Who Should Do It Benefit
    Install official OTA updates All users Keeps modem compatibility, reduces risk to baseband
    Use manufacturer firmware matching model/CSC Experienced users and technicians Minimizes chance to prevent Samsung IMEI null and avoid baseband unknown
    Backup EFS Samsung and NVRAM All users before flashing Allows restoration of IMEI and network data if partitions are damaged
    Keep IMEI records off-device All users Makes re-registration with carrier straightforward if needed

    By following these steps, we lower the risk of IMEI loss. Cautious firmware handling and reliable backups help avoid baseband issues. This makes recovery faster if problems arise.

    Additional Resources and Support Options

    We’ve put together a list of places to get help when your Samsung device has IMEI errors or shows a network not registered status. These resources help us check our steps, compare firmware, and find fixes that work. We avoid services that can change your IMEI.

    Samsung IMEI null help

    Online Forums and Community Support

    We look to active communities for help with our Samsung devices. Sites like XDA Developers have detailed threads for many Samsung models. They offer logs and advice on flashing.

    Reddit communities like r/GalaxyS and r/Samsung also have user reports and recovery tips. These can guide us to reliable fixes.

    When using forums, we check the author’s reputation. We also make sure any steps we follow are safe and legal. This helps us avoid dangerous IMEI changes while we look for ways to fix our Samsung devices.

    Manufacturer Customer Service

    We suggest contacting Samsung US support for help. You can call, chat, or visit an authorized service center. They have the tools to diagnose and fix hardware and software problems that cause IMEI loss.

    Before reaching out, gather your device model, any visible IMEI, proof of purchase, and warranty details. This information helps the technicians decide if a repair or official restore is needed. They can also tell you if you need to reactivate your device with the carrier.

    Useful Links for Further Assistance

    We use trusted firmware archives and carrier pages for official files and activation help. Sites like SamMobile and Firmware.mobi list stock firmware and model-specific builds for clean restores. Carrier support pages have policies and checks for devices with network not registered issues.

    If a carrier flags your device after an IMEI restore, contact them. They can guide you through the registration steps and any account requirements. Working with both manufacturer resources and carrier support helps speed up the recovery process and reduces downtime.

    Resource What We Get When to Use
    XDA Developers Model-specific guides, logs, firmware links When looking for community-tested recovery steps
    Reddit (r/GalaxyS, r/Samsung) User reports, step-by-step experiences To validate real-world outcomes before trying a fix
    Samsung US Support Official diagnostics, authorized repairs, warranty service For secure repairs and when hardware faults are suspected
    SamMobile / Firmware.mobi Stock firmware downloads and version histories When performing an official firmware restore to avoid IMEI issues
    Carrier Support Pages Activation procedures and IMEI registration policies If device shows network not registered support after restoration

    Conclusion: Regaining Mobile Functionality

    We’ve shown you how to fix IMEI problems so you can use your phone again. First, check if your IMEI is null or baseband unknown. Then, try simple fixes like restarting your phone, checking the SIM, and looking at network settings.

    If these steps don’t work, try re-registering your device and checking the IMEI. For Samsung phones, use Samsung Smart Switch or Odin to fix the modem and system images. If all else fails, get help from an authorized service to avoid legal issues and keep your warranty.

    Our first steps to fix Samsung IMEI issues are safe and easy to reverse. We advise against changing your device’s identifiers. Instead, follow steps to reinstall official firmware and keep EFS/NVRAM data safe. This keeps your device working right and follows carrier rules.

    To avoid problems in the future, back up your device’s data and write down the original IMEI before making any changes. Always use official firmware and keep your software up to date. These steps help prevent problems, reduce the risk of network errors, and make fixing issues easier and more reliable.

    FAQ

    What does “IMEI null” or “IMEI: unknown” mean after changing Samsung firmware?

    IMEI null means your phone’s International Mobile Equipment Identity is gone. This happens when firmware changes mess up the modem or EFS data. Your device might show “baseband: unknown” and can’t connect to networks.

    What common actions during flashing cause IMEI to disappear?

    Flashing the wrong firmware or interrupting the process can cause IMEI loss. Using bad EFS backups or wrong PIT files also leads to problems. Faulty tools or incorrect modem packages can corrupt the EFS/NVRAM.

    What immediate signs tell us the phone has an IMEI null problem?

    Look for no mobile signal, “No service,” or “IMEI: null” in Settings. *#06# should show your IMEI, but it might be blank. You might see “network not registered” errors and can’t send SMS or use data.

    What basic troubleshooting steps should we try first?

    First, try a full power off and restart. Check SIM and network settings. If these steps don’t work, you might need more advanced fixes.

    Can we re-register the IMEI ourselves using dialer codes?

    Dialer codes can show your IMEI, but they can’t rewrite it. To fix IMEI, you need an EFS backup or special tools. Always follow the law and only restore the original IMEI.

    How can Samsung Smart Switch help restore IMEI or baseband?

    Smart Switch can install official firmware and fix software issues. It’s good for those who don’t want to use manual tools. Make sure your device is recognized by the PC and supported by the software.

    When should we use Odin, and what parts are critical to fix baseband unknown?

    Use Odin to install Samsung firmware. Flashing the right CP (modem) and fixing the EFS partition are key. Use model- and region-specific firmware and follow tested procedures carefully.

    If Odin or Smart Switch doesn’t work, when should we seek professional help?

    Go to a Samsung service center if DIY tools fail. They can handle hardware issues and warranty checks. Authorized technicians have the tools to safely fix your device.

    How can we verify IMEI restoration after repair attempts?

    Check Settings > About phone and dial *#06#. Make sure the IMEI matches the original. Also, verify the Baseband version and network registration.

    What documentation should we keep to help restore IMEI if it’s lost?

    Keep the original IMEI from the box or carrier account. Back up your data and EFS/NVRAM before firmware changes. These backups help with legitimate restoration.

    Are there legal or warranty risks when attempting to restore IMEI?

    Yes. Changing IMEI to hide identity is illegal. Restoring a lost IMEI is okay, but be careful with unofficial tools. Always contact Samsung support before risky actions.

    How can we avoid IMEI null problems in the future?

    Use official OTAs and avoid unofficial ROMs. Verify firmware matches your device before flashing. Back up EFS/NVRAM and data before changes. Be aware of warranty implications when unlocking or rooting.

    Where can we find reliable firmware and community guidance for Samsung devices?

    Check Samsung’s support pages, SamMobile, and Firmware.mobi for firmware. XDA Developers and Reddit communities offer community help. Always verify the reputation of guides and avoid illegal services.

    What costs should we expect if we take the phone to a service center?

    Costs vary. Warranty repairs might be free for official update issues. Out-of-warranty repairs can cost more. Contact the service center for estimates.